Welcome to the fascinating world of flower gardening! Today, we’re going to embark on a delightful journey and learn how to Grow Canna Lilies.
Canna Lilies are vibrant, tropical flowers that can transform any garden into an exotic paradise. Their large leaves and stunning blooms make them a striking addition to any outdoor space.
So, if you’re ready for an exciting horticultural adventure, keep reading about Grow Canna Lilies. Let’s dive in and get our hands dirty with some practical gardening tips!
Key Takeaways
- Canna Lilies are tropical flowers that love the sun, so pick a sunny spot for them.
- They need well-drained soil; too much water can rot their roots.
- Plant them 2 inches deep and 1 to 2 feet apart after the last frost in spring.
- Feed them with high phosphorus fertilizer every month during growing season.
- Cut back dead foliage in fall and dig up rhizomes in colder regions for winter storage.
- Watch out for pests like slugs, snails, and canna leaf rollers.

Understanding Canna Lilies
Dive into the colorful and vibrant world of Canna Lilies, where beauty meets versatility. From their lush foliage to their striking blooms, discover why these tropical treasures are a must-have in any garden.
What are Canna Lilies?
Canna Lilies, with their bold and tropical flair, are not true lilies at all. Originating from tropical regions of the Americas, they boast large, banana-like leaves and vibrant flowers that come in a palette of reds, oranges, yellows, and pinks. These perennials thrive in warm climates and bring an exotic touch to any landscape.
In gardens, Canna Lilies serve as stunning focal points or background plants due to their impressive height and broad leaves. Their ability to bloom from early summer until the first frost makes them invaluable for continuous color. Whether planted in beds or containers, these ornamental gems add a dramatic flair to ornamental gardening with Cannas.
Different Varieties of Canna Lilies
Understanding the diversity among types of Canna Lilies is key to selecting the perfect match for your garden. With varieties ranging from towering giants to compact dwarfs, Cannas can fit into various garden designs and sizes.
Popular varieties like ‘Tropicanna’ dazzle with multi-colored foliage and orange blooms, while ‘Stuttgart’ offers unique variegated leaves contrasted by orange flowers. Dwarf varieties such as ‘Cannova Yellow’ are ideal for smaller spaces or containers without sacrificing vibrancy. When choosing a variety, consider factors like size, bloom color, and leaf pattern to complement your garden’s conditions and aesthetic goals.
| Variety Name | Flower Color | Height | Sunlight Requirement | Watering Needs |
|---|---|---|---|---|
| Tropicanna | Orange | 4-6 ft | Full sun | Medium to high |
| Australia | Red | 4-6 ft | Full sun to partial shade | Medium |
| Pretoria (Bengal Tiger) | Yellow with orange spots | 5-6 ft | Full sun | Medium to high |
| Pink Sunburst | Pink | 2-3 ft | Full sun to partial shade | Medium |
| Cleopatra | Red and yellow | 3-4 ft | Full sun | Medium |
| Eureka | Yellow | 2-3 ft | Full sun | Low to medium |
| Stuttgart | White and green foliage | Up to 3 ft | Partial shade | Medium |
| Wyoming | Orange | Up to 6 ft | Full sun | Medium to high |
Why Grow Canna Lilies?
Why should you grow Canna Lilies? For starters, they’re remarkably low maintenance yet offer high impact. These resilient plants tolerate poor soil conditions and still reward you with lush foliage and vivid blooms. Additionally, they’re excellent at attracting pollinators like bees and hummingbirds to your garden.
Beyond their practical benefits, Cannas can transform any outdoor space into a tropical paradise. Whether you have a formal garden or a casual outdoor living area, incorporating Cannas adds texture, color, and life. So why not give them a spot in your garden? They might just become your new favorite plant!
Preparing to Plant Canna Lilies
Before you dive into the world of Grow Canna Lilies, let’s talk dirt and location. Yes, where and how you plant these beauties can make or break your garden show. So, grab your gardening gloves, and let’s get down to the nitty-gritty of setting the stage for a spectacular bloom.
Choosing the Right Location for Planting
Picking the perfect spot is like choosing a seat at a concert – location matters! Canna lilies love the spotlight, thriving in areas where they can bask in full sun. Think about that sunny corner of your garden that gets at least 6 hours of direct sunlight. That’s your gold spot.
But wait, there’s more to it than just sunlight. Drainage plays a big role too. These plants aren’t fans of wet feet, so ensure your chosen location doesn’t turn into a mini pool after rain. A well-draining spot keeps root rot at bay and your cannas happy.
Now, positioning is key to maximizing their beauty. Plant them where they can be seen! Whether it’s framing a walkway or as a backdrop to other flowers, cannas are showstoppers. They’re like the lead singer in a band – front and center.
Remember, good drainage and plenty of sunlight are non-negotiables for these flowering plants. Get this right, and you’re on track for an eye-popping display.
Soil Preparation for Canna Lilies
Soil prep is like laying down a red carpet for your cannas; it needs to be just right. Start by breaking up any compact soil because these divas don’t do well with tough crowds (aka hard soil). Aim for loose, well-draining earth that makes root growth smooth sailing.
Next up: organic matter is your best friend here. Mixing compost or aged manure into the soil not only improves drainage but also adds essential nutrients back into the ground—think of it as feeding your soil so it can feed your plants.
pH levels can sound science-y but don’t sweat it. Cannas prefer slightly acidic to neutral ground (pH 6-7). If you’re unsure about your soil’s pH, grabbing a test kit from your local garden store is super easy and helps avoid any guesswork.
Lastly, consider raising the bed or creating mounds if drainage is an issue in your garden. This simple step ensures water flows away from roots efficiently, preventing soggy conditions that can lead to problems down the line.
By enriching garden soil with organic matter and ensuring proper pH levels are met, you’re setting up a strong foundation for Grow Canna Lilies success.
Step-by-Step: Planting and Growing Canna Lilies
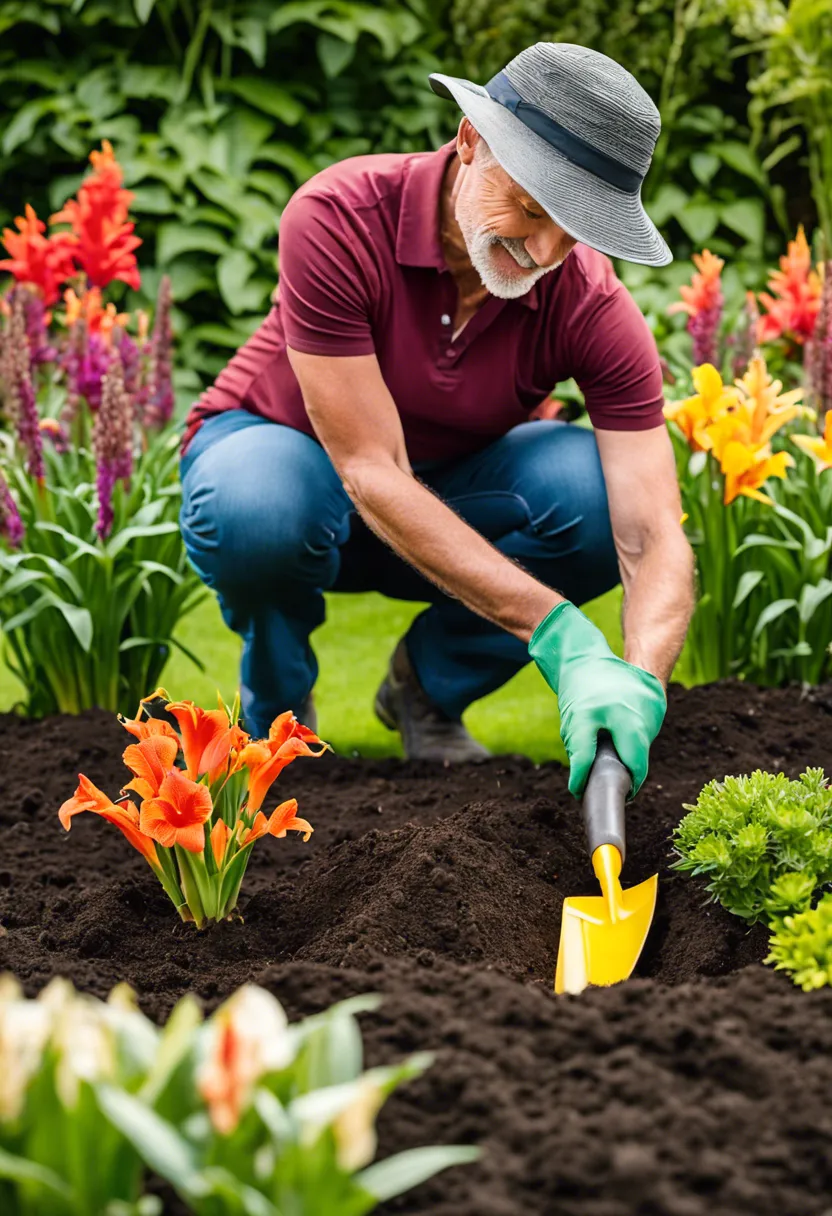
Now that we’ve got our garden gloves on and a sunny spot picked out, let’s dive into the nitty-gritty of planting and growing canna lilies. These flamboyant flowers are not just any plant; they’re like the divas of the garden world, demanding attention with their bold blooms and lush foliage. But don’t worry, making them thrive is easier than you might think. Follow these steps to ensure your canna lilies hit their high notes.
-
Choose the right time to plant. Canna lilies love warmth, so wait until all danger of frost has passed in your area. If you’re starting with rhizomes (those chunky root structures), early spring is your cue to get planting.
-
Prepare your soil like a pro. These plants are not too picky, but they do enjoy a good, rich soil. Mix in some compost or well-rotted manure to give them a nutritious start. Ensure the site drains well because while canna lilies enjoy moisture, they don’t want to swim.
-
Plant those rhizomes correctly. Lay them horizontally about 4-6 inches deep and cover gently with soil, spacing them about 1 to 2 feet apart depending on the variety’s size at maturity. This gives each plant room to flourish without overcrowding.
-
Water generously right after planting. This initial soaking helps settle the soil around the rhizomes and ensures they have enough moisture to start sending out roots and shoots.
-
Mulch to maintain moisture and temperature levels around your plants, especially during hotter months. A layer of organic mulch also keeps those pesky weeds at bay.
-
Fertilize for fabulous flowers and foliage. Use a balanced fertilizer every 4-6 weeks during the growing season to feed your canna lilies’ hunger for nutrients.
-
Watch for growth signs as temperatures warm up. You’ll see shoots emerging from the ground, heralding the start of something beautiful.
-
Support, if necessary, taller varieties that might struggle under the weight of their own beauty—staking helps prevent wind damage or bending stems.
-
Deadhead spent flowers to encourage more blooms throughout the season until fall signals it’s time for rest.
-
Finally, when autumn arrives and frost threatens once more, it’s time to dig up those rhizomes in colder regions for storage over winter or simply protect them with a thick layer of mulch if you’re in a milder climate where they can stay put year-round.
Care and Maintenance of Canna Lilies
Caring for Canna Lilies is like throwing a party for your plants where water, food, and grooming are the main events. Get these right, and you’ll be rewarded with a spectacular floral fiesta.
Watering Requirements for Canna Lilies
Watering Canna Lilies isn’t rocket science, but it does require a bit of finesse. These plants love their water like a fish loves its pond. However, they don’t appreciate soggy feet. Aim to keep the soil consistently moist but not waterlogged. The hydration for Cannas should be just enough to quench their thirst without drowning them.
In hot climates or during dry spells, your Cannas might get thirstier than usual. This means you might need to water them more frequently – think of it as offering a refreshing drink on a scorching day. On the flip side, if you’re in an area with lots of rain or have heavy clay soil that holds moisture well, ease up on the watering can.
Beware of overwatering symptoms like yellowing leaves or wilting; it’s a sign you’ve been too generous with the H2O. Remember, these plants do have some drought tolerance in Cannas, so missing a day or two won’t spell disaster.
Fertilizing Needs of Canna Lilies
To see your Canna Lilies strut their stuff with vibrant blooms and lush foliage, feeding them is key. Think of fertilizer as their personal buffet – it needs to have all the right nutrients to keep them happy and healthy.
The best fertilizer for Cannas strikes a balance between promoting strong growth and encouraging those eye-catching flowers we all love. A slow-release granular fertilizer works wonders, providing steady nutrition over time. For those leaning towards organic gardening, compost or well-rotted manure are great options that feed both your plants and the soil.
Timing is everything when it comes to feeding schedule for lily plants. Start fertilizing in early spring when new growth appears and continue every 4-6 weeks until late summer. This keeps the party going throughout their growing season.
Pruning and Deadheading Canna Lilies
Pruning and deadheading aren’t just about keeping appearances; they’re crucial for ensuring your Canna Lilies are living their best life. By removing spent flowers (deadheading), you encourage more blooms to take their place – it’s like making room on the dance floor for fresh moves.
When it comes to pruning Canna Lilies, think of it as giving your plant a haircut to remove any brown or damaged leaves; this not only tidies up your garden but also helps prevent disease by improving air circulation around the plant.
The best time to wield your pruning shears is in late winter or early spring before new growth starts. This sets the stage for robust growth and plenty of flowers in the coming months. And remember, cutting back lily plants isn’t just about aesthetics; it’s about rejuvenating overgrown Cannas and giving them a fresh start each year.
Common Problems and Solutions when Growing Canna Lilies
Facing challenges while trying to grow canna lilies? You’re not alone. From sneaky pests to tricky diseases, these vibrant flowers can test your patience. But don’t worry, we’ve got the gardening solutions you need.
Identifying Common Diseases in Canna Lilies
When it comes to canna lily care, keeping an eye out for trouble is half the battle. Ever noticed your canna lily looking a bit off? Maybe its leaves have mysterious spots or its vibrant colors seem faded. These could be signs of canna lily rust or other fungal infections in plants. Rust, in particular, shows up as orange or yellowish spots on the leaves, making your plant look like it’s stuck in a perpetual autumn.
But here’s the kicker: early identification is crucial. The sooner you spot these signs of unhealthy flowers, the better your chances of saving your garden from a full-blown plant epidemic. Regularly playing detective in your garden isn’t just about admiring your blooms; it’s about plant health monitoring and catching those pesky diseases before they become a real headache.
So, what do you do if you find something amiss? First off, don’t panic. Many common diseases can be managed with the right approach to disease prevention in gardens. This might involve removing affected parts of the plant or applying fungicides carefully according to their instructions. Remember, healthy flower growth starts with proactive care and keeping those dreaded diseases at bay.
Pest Control Measures for Healthy Growth
Now let’s talk bugs – not exactly dinner table conversation but crucial when aiming for that lush garden full of healthy canna lilies. Pests love these plants as much as we do, but unfortunately, their idea of appreciation involves nibbling away at leaves and flowers.
The good news is that there are plenty of ways to protect your canna lilies from pests without turning your garden into a chemical warfare zone. For starters, organic pest control methods like neem oil or insecticidal soap can work wonders against aphids and spider mites while being kinder to the environment.
But sometimes, more stubborn invaders require pulling out the big guns – yes, I’m talking about chemical pesticides safety. If you go down this route, make sure you’re using products approved for use on canna lilies and always follow label directions to avoid harming your plants or local wildlife.
Remember, whether you choose organic methods or need to resort to chemicals occasionally, the goal is always eco-friendly gardening practices that ensure long-term health and beauty of your garden without compromising on safety measures. Keeping pests at bay is not just about spraying and praying; it’s about creating a balanced ecosystem where your canna lilies can thrive without constant threats from unwanted guests.
Harvesting and Storing Canna Lily Bulbs
When it comes to ensuring the vitality of your Canna Lilies for the next blooming season, timing is everything. The process of harvesting and storing these vibrant bulbs isn’t just about keeping them safe through the winter; it’s about setting the stage for a spectacular show come spring. Let’s dive into how you can master this crucial gardening task.
Firstly, recognizing the Signs for harvesting Canna bulbs is key. As fall approaches and the first frost kisses your garden, your Canna Lilies will naturally begin to wither. This is nature’s way of telling you it’s time. Wait until the foliage turns brown but act before severe frost damages the bulbs.
- Gently dig around the base of your plant with a shovel or gardening fork, being careful not to slice into the bulbs.
- Lift them from the soil and shake off any excess dirt.
- Rinse them lightly with water to remove remaining soil and let them air dry for a few days in a cool, shaded area to prevent rot.
Now, onto Canna Lily bulb storage—the secret sauce to Winterizing Canna Lily bulbs involves creating an environment that mimics their natural dormant state while protecting them from extreme cold and moisture.
- After drying, trim off any remaining foliage close to the bulb.
- Store your bulbs in a breathable container like a cardboard box or mesh bag filled with peat moss or vermiculite.
- Keep them in a cool, dry place where temperatures remain between 40-50°F (4-10°C).
Avoid common pitfalls such as storing wet bulbs which can lead to mold or placing them in an area too warm which might trick them into sprouting prematurely.
By following these steps for Preparing Canna bulbs for winter, you’re not just Storing Canna Lilies over winter; you’re also safeguarding their beauty for seasons to come. And when spring whispers its return, these stored treasures will be ready for replanting, promising another year of dazzling blooms in your garden.
Next up, we’ll explore how best to replant stored Canna bulbs, ensuring they wake from their slumber ready to dazzle once more with minimal fuss and maximum flourish.

To Wrap Up
So, you’ve ventured through the wonderful world of flower gardening and discovered how to Grow Canna Lilies. Remember, these beauties need a sunny spot and a good drink, but not too much – we don’t want them drowning.
We also learned that they are pretty low maintenance. A little bit of fertilizer here, some deadheading there, and voila! You’ll have a garden full of tropical splendor in no time.
Finally, don’t forget that canna lilies are not just about the looks – they’re also great for attracting beneficial wildlife to your garden. So why wait? Start planting those bulbs today and watch your garden transform into a tropical paradise.