Welcome to the world of Orchid Care! If you’re new to it, don’t fret. It’s not as complicated as it sounds. Orchids are a beautiful way to add a tropical touch to your indoor space.
Phalaenopsis, or Moth Orchids, are one of the most popular types of orchids. Known for their stunning blooms and relatively easy care, they make a great choice for beginner orchid growers.
This blog post will walk you through everything you need to know about growing Phalaenopsis orchids indoors. From understanding their origin and characteristics to recognizing signs of stress or disease in your plant – we’ve got you covered. So let’s dive right in! Keep reading about Orchid Care.
Key Takeaways
- Moth orchids, or Phalaenopsis, are perfect for indoor growing due to their low light and temperature requirements.
- They prefer indirect sunlight, so place them near a north or east-facing window.
- Water them once a week, but make sure the pot drains well to avoid root rot.
- Keep the room temperature between 65 and 80 degrees Fahrenheit.
- Fertilize every two weeks with a balanced orchid fertilizer.
- Prune after blooming to encourage new growth.

Understanding Phalaenopsis Orchids
Dive into the world of Phalaenopsis orchids, a group that stands out for its elegance and simplicity in orchid care. These beauties are more than just a pretty face; they bring a slice of the tropics right into your living room.
Origin and Characteristics of Phalaenopsis Orchids
Phalaenopsis orchids, affectionately known as moth orchids, hail from the lush, humidity-rich jungles of Asia and Australia. Their natural habitat is a clue to their phalaenopsis cultivation tips: think warm, moist, and shaded. This tropical background has shaped them into the resilient and adaptable plants we love to grow indoors.
Transitioning from their origins to their looks, moth orchids boast broad, glossy leaves that emerge from a central stem, creating a striking visual contrast with their delicate blooms. The flowers themselves are something out of a fairy tale—butterfly-like petals floating above the foliage in an array of colors and patterns. Each variety brings its own unique flair to the table, from pure whites to deep purples, making them a diverse group within the orchid species origins.
Their growth conditions mimic those found in their native jungles. Phalaenopsis thrive in indirect light and high humidity, characteristics typical of many tropical plants. This makes them well-suited for indoor environments where such conditions can be easily replicated.
Why Grow Phalaenopsis Orchids Indoors?
Bringing phalaenopsis orchids into your home or office isn’t just about adding splashes of color; it’s about reaping multiple benefits that extend beyond aesthetics. Firstly, these plants are known for their air-purifying qualities. They can help remove toxins from your environment, making the air you breathe cleaner and fresher—a big win for any indoor space.
Next up is their undeniable beauty which contributes significantly to home decor. A well-placed moth orchid can transform a dull corner into a vibrant focal point or add sophistication to your work desk. Their long-lasting blooms ensure you enjoy this beauty for months on end.
But perhaps one of the most compelling reasons to invite these easy-care indoor plants into your life is their positive impact on mental health. Studies suggest that being around greenery reduces stress levels and boosts mood—an effect we could all use more of in our busy lives.
In essence, growing phalaenopsis orchids indoors offers not just an opportunity to flex your green thumb but also enhances your living space’s aesthetic appeal while contributing positively to your wellbeing.
Essential Requirements for Growing Phalaenopsis Orchids Indoors
Creating the perfect indoor oasis for your Phalaenopsis orchids isn’t rocket science, but it does require a bit of know-how. Let’s dive into the essentials: temperature and humidity, light exposure, and watering practices.
Ideal Temperature and Humidity Levels
Phalaenopsis orchids are like Goldilocks; they prefer conditions that are just right. Not too hot, not too cold. The phalaenopsis temperature range should ideally hover between 65°F to 80°F during the day. At night, they can handle a slight dip down to about 60°F. Straying too far from these temperatures could turn your orchid’s leaves into an unhappy yellow or cause bud drop.
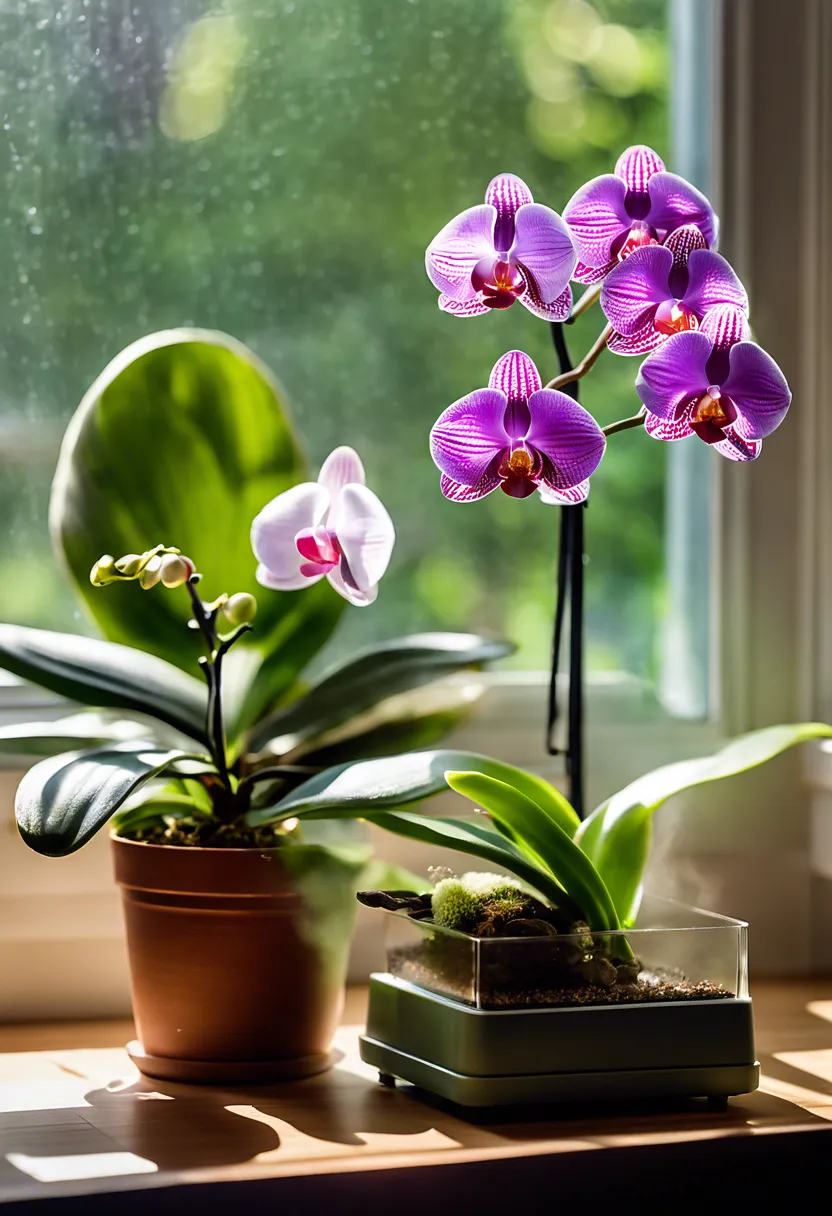
Transitioning to humidity, these tropical beauties thrive in environments that mimic their natural habitat. Aim for an ideal humidity for orchids around 40% to 70%. If you’re scratching your head wondering how on earth you’re supposed to maintain such specific conditions, don’t fret. Monitoring tools like hygrometers can be your best friend here, allowing you to keep an eye on both temperature and humidity levels with ease.
Adjusting home humidity for your leafy friends might sound daunting but can be as simple as placing a humidifier nearby or setting up a water tray beneath the plant’s pot. Remember, maintaining orchid temperature indoors and keeping that air moist will make your Phalaenopsis feel right at home.
Light Requirements for Indoor Phalaenopsis Orchids
When it comes to light, think bright but indirect. Direct sunlight? That’s a big no-no unless you’re aiming for crispy leaves instead of lush green ones. Your Phalaenopsis is seeking that sweet spot of phalaenopsis light needs, which usually means a north or east-facing window where the sun’s rays are gentler.
If you find yourself in a dimly lit apartment fearing for your orchid’s life—fear not! Artificial grow lights can come to the rescue. Just remember, whether it’s natural or artificial light, moderation is key to preventing light burn in orchids.
Positioning is everything. Too much direct sunlight and you risk scorching; too little and your plant might never bloom. Playing around with placement until you find that perfect balance of light will pay off when you see those stunning blooms.
Watering Needs of Indoor Phalaenopsis Orchids
Watering might just be the most nerve-wracking part of indoor orchid care—too much love (aka water) and you’ll drown them; too little and they’ll parch. A good rule of thumb is once every 7 to 10 days, adjusting based on factors like humidity, temperature, and airflow in your home.
Now let’s talk technique because yes, there’s a right way to water these plants! Ditch the watering can in favor of soaking the potting media thoroughly until water runs freely from the drainage holes—this ensures all roots get hydrated without leaving standing water (a big no-no).
Remember: overzealous watering is often more harmful than under-watering when it comes to watering phalaenopsis orchids. Pay attention to your plant’s leaves—they’ll tell you if they’re thirsty or if they’ve had one too many drinks.
Step-by-Step: Planting and Caring for Indoor Phalaenopsis Orchids
Now that we’ve got our Phalaenopsis orchids home, it’s time to roll up our sleeves and get down to the nitty-gritty of planting and caring for these beauties indoors. Don’t worry; it’s not rocket science. But, like making a perfect grilled cheese sandwich, there’s an art to getting it just right. Let’s dive into the steps that will ensure your moth orchids thrive in their new environment.
-
Choose the right pot: Phalaenopsis orchids love snug spaces but need room to breathe. Opt for a clear pot with drainage holes at the bottom. This setup allows roots to soak up sunlight and excess water to escape, preventing root rot.
-
Select the perfect potting mix: Forget regular soil; these divas demand a special mix. A blend of bark, sphagnum moss, and charcoal keeps things airy and mimics their natural habitat. Your orchid will thank you by blooming beautifully.
-
Potting your orchid: Gently remove your orchid from its nursery pot, being careful not to damage the roots. Trim any dead or mushy roots with sterilized scissors. Place your orchid in its new pot and gently pack the potting mix around it, ensuring it stands upright and secure.
-
Finding the sweet spot: Orchids adore indirect light—think bright, but no direct sunbeams that could scorch their delicate leaves. A windowsill facing east or shaded south is ideal. They’re like vampires in that sense; they enjoy the light but can’t bask in it directly.
-
Water wisely: Overwatering is a common oops among orchid parents. Wait until the top inch of the potting mix feels dry before watering thoroughly but infrequently—usually once a week does the trick. Remember, it’s better to under-water than over-water.
-
Feed them treats: Like feeding fish in a tank, fertilizing your orchid should be done with care and precision—a balanced 20-20-20 fertilizer every other week during growth periods will do wonders for your plant’s health and flowers.
-
Maintain humidity: These tropical natives crave moisture in the air around them—aim for 40-70% humidity levels by placing a humidifier nearby or setting up a humidity tray filled with pebbles and water beneath their pots.
-
Pruning time: After blooming has ceased, encourage future flowers by pruning just above an “eye” (a node on the stem) using sterilized scissors or shears—this stimulates new growth without stressing out your plant too much.
-
Repotting rituals: Every couple of years or when you notice roots poking out of drainage holes, it’s time for a fresh start in a slightly larger pot with new potting mix to keep things fresh and healthy.
By following these steps carefully, you’ll create an indoor oasis where your Phalaenopsis orchids can flourish and bloom year after year, bringing beauty and joy into your home without needing a green thumb certificate from Mother Nature herself!
Common Problems in Growing Phalaenopsis Orchids Indoors
Navigating the world of orchid care can feel like tiptoeing through a minefield of potential problems. But fear not! We’re here to guide you through the common hiccups with Phalaenopsis orchids indoors.
Recognizing Signs of Stress or Disease in Your Orchid
Ever wondered why your orchid looks sadder than a rainy day in Seattle? It could be screaming for help due to stress or disease. Spotting the orchid stress signs early can save you a lot of heartaches. Let’s start with the leaves – if they’re limper than overcooked spaghetti, something’s up. Healthy orchid leaves should be firm and green, not yellow or wrinkly.
Next up, let’s talk roots. If they look more like something you’d find at the bottom of your shoe rather than healthy, plump roots, it’s time to pay attention. Root health in orchids is crucial; they should be white or green and firm to the touch.
Detecting Phalaenopsis disease symptoms early is key. Keep an eye out for spots on leaves or flowers that weren’t there before – these could be telltale signs of fungal or bacterial infections. Regular monitoring isn’t just about admiring your plant’s beauty; it’s about catching these issues before they turn into big problems.
Remember, caring for indoor orchids means being a bit of a detective. By keeping a close eye on your plant and looking out for these symptoms, you can ensure your Phalaenopsis remains as vibrant and healthy as possible.
Dealing with Pests on Indoor Orchids
Just when you thought you had orchid care down pat, along come pests to crash the party. But don’t worry; we’ve got the 411 on keeping those pesky critters at bay.
First off, meet aphids and mealybugs – the uninvited guests that love snacking on your precious Phalaenopsis. These guys are tiny but mighty when it comes to causing damage. Spotting them early is crucial; keep an eye out for sticky residue on leaves or tiny white fluffs hiding in crevices.
Now, how do we show them the door? For starters, a gentle shower under lukewarm water can dislodge these pests without harming your plant. If they’re stubborn, dabbing them with a cotton swab dipped in rubbing alcohol might just do the trick.
Preventing pests on indoor plants starts with good hygiene practices. Ensure your growing area is clean and avoid overcrowding plants – pests love cramped spaces! Also, introducing natural predators like ladybugs can help keep aphid populations in check.
Remember, dealing with indoor orchid pests doesn’t have to involve harsh chemicals that could harm your plant. With some vigilance and gentle treatment options, you can protect your Phalaenopsis from unwanted guests and keep it thriving indoors.
Tips to Encourage Blooming in Indoor Phalaenopsis Orchids
Getting your indoor Phalaenopsis orchids to bloom might seem like a magic trick, but it’s all about understanding their needs and mimicking their natural habitat as closely as possible. Here are some foolproof tips to help you achieve those coveted blooms.
First off, indoor orchid lighting needs cannot be overstated. These plants thrive under bright, indirect light. Think of a spot near a window where the sun doesn’t directly beat down on them. Too much direct sunlight can scorch their leaves, while too little will stunt their growth and blooming potential.
Next up is maintaining the optimal temperature for orchids. Phalaenopsis orchids enjoy a slight drop in temperature at night, around 10-15 degrees cooler than daytime temperatures. This temperature variance is crucial for triggering the bloom cycle of Phalaenopsis.
When it comes to fertilizing moth orchids, less is more. Use a balanced fertilizer every other week during the growing season, but ease up once buds start to form. Over-fertilizing can harm your plant more than help it.
Don’t forget about humidity requirements for orchids; these tropical beauties love moist air. Placing a humidifier nearby or setting your plant on a tray filled with pebbles and water can keep humidity levels ideal without overwatering the soil.
Lastly, pruning moth orchids after they bloom encourages future blooms. Cut just above the second node beneath the spent flower spike to potentially stimulate a secondary spike.
By following these guidelines and keeping an eye out for signs of healthy orchid blooms, such as firm green leaves and strong roots, you’ll be well on your way to enjoying vibrant Phalaenopsis flowers indoors. Remember, patience and consistent Phalaenopsis orchid care are key to encourage orchid blooming year after year.
Preventive Measures for Healthy Growth of Indoor Moth Orchid
Keeping your indoor moth orchid thriving isn’t just about giving it water and light; it’s also about preventing problems before they start. Think of it like setting up a little safety net for your plant buddy, so it can grow without any hiccups. Here’s how to keep the good vibes going and the bad ones at bay.
-
Check regularly for pests like aphids and mealybugs. These tiny party crashers love to suck the life out of your orchid. Literally. Use a magnifying glass if you have to, and if you spot them, show them the door with insecticidal soap or neem oil.
-
Maintain proper humidity levels around 40-70%. Too dry, and your orchid might start feeling thirsty; too wet, and it might catch a cold in the form of fungal diseases. A pebble tray or humidifier can be your best friend here.
-
Ensure good air circulation around the plant. Stagnant air is like a stagnant party – nobody likes that. It invites all sorts of fungal and bacterial guests without an invite. A gentle fan or an open window can help keep the air moving.
-
Water wisely by letting the top inch of soil dry out between watering sessions. Overwatering is like forcing your orchid to drink way more than it can handle – uncomfortable and unhealthy.
-
Repot every couple of years in fresh orchid mix to prevent root rot and give your plant room to grow. It’s like moving to a bigger house with better facilities – everyone loves an upgrade!
-
Fertilize lightly, but regularly during the growing season with a balanced fertilizer diluted to half-strength. It’s like giving your orchid a consistent diet of healthy food so it can grow strong and bloom beautifully.
By following these simple steps, you’re not just avoiding problems; you’re setting up your moth orchid for a happy, healthy life indoors.

To Wrap Up
Growing Phalaenopsis Orchids indoors can be a rewarding experience, if you’ve got the right tools and knowledge. We’ve covered everything from choosing the right pot and soil, to watering techniques, light requirements and temperature control.
Remember, patience is key in Orchid Care. They may not bloom immediately but with time, you’ll be rewarded with beautiful flowers.
Finally, don’t forget to enjoy the process! These stunning plants are more than just decor; they’re a hobby that brings joy and peace.