Welcome, fellow garden enthusiasts! Ever wondered why your azaleas aren’t blooming as expected? The secret lies in the soil. Preparing Garden Soil for Azaleas can make all the difference between a vibrant, blooming garden and a less than stellar one.
Azaleas are not just any ordinary plant; they require specific conditions to thrive. And believe it or not, your garden soil plays a significant role in this. It’s not about just digging a hole and planting; it’s more about understanding what these beautiful plants need.
So buckle up and get ready to delve into the world of azaleas. By the end of this guide, you’ll be well on your way to cultivating an azalea garden that is the envy of your neighbors. Keep reading about Preparing Garden Soil for Azaleas.
Key Takeaways
- Azaleas love acidic soil, so test your garden’s pH level first. Aim for a 4.5-6.0 range.
- Improve the soil structure by adding organic matter like compost or peat moss.
- Ensure good drainage to avoid root rot. If your soil is clayey, consider raised beds or containers.
- Fertilize with a slow-release, acid-forming fertilizer after planting.
- Mulch around the base of azaleas to retain moisture and suppress weeds. Pine bark or pine needles work great!

Understanding Azaleas
Azaleas are not just any plants; they’re like the divas of the garden world, demanding attention with their vibrant blooms and lush foliage. To keep these beauties thriving, it’s crucial to master azalea care tips and understand their unique needs. From growing azaleas that turn heads in your neighborhood to mastering azalea maintenance, it all starts with getting to know these plants inside out. Whether you’re planning an azalea garden preparation or looking to enhance your existing space, knowing about azalea plant characteristics is your first step towards a stunning display.
The Importance of Soil for Azaleas
Let’s talk dirt, specifically the kind under your azaleas. You see, soil isn’t just “dirt”; it’s the life support system for your plants. For azaleas, getting the soil right is like hitting the jackpot in Vegas – it can lead to a spectacular bloom show that’ll make your neighbors green with envy. Proper soil quality for azaleas ensures they get just the right amount of water without staying soggy, which is crucial because no one likes wet feet, especially not azalea roots.
Now, diving deeper into why this matters – optimal drainage needs for azaleas and nutrient availability go hand in hand with good soil structure. Imagine trying to drink a milkshake through a straw that’s too small; that’s what poor drainage feels like for azaleas. On the flip side, too much sand in the mix and water zips through faster than kids on a sugar rush after a birthday party. Finding that sweet spot in improving soil for azaleas means their roots can breathe easy and soak up nutrients efficiently, setting the stage for robust growth and those envy-inducing blooms we all love.
Specific Soil Requirements for Azaleas
Getting down to brass tacks here – not all soils are created equal when it comes to pampering your azaleas. These divas demand an acidic encore, with an ideal pH for azaleas hanging out between 4.5 and 6.0. Too alkaline and they’ll throw a fit worse than a toddler denied candy. But fear not! Adjusting your soil’s pH is less complicated than programming a VCR (remember those?). It might involve adding sulfur or organic matter like pine needles to bring down the pH level.
Texture-wise, think of Goldilocks – you want it just right. The best soil texture for azaleas strikes a balance between drainage and moisture retention; think loamy goodness enriched with organic matter such as compost or leaf mold. This setup creates a cozy environment where roots can spread out without feeling cramped or waterlogged.
Lastly, don’t play guessing games with your soil’s condition – test it! Using a simple testing kit from your local garden center can reveal if you’re on point or if adjustments are needed. Whether it’s tweaking the pH or boosting organic content in your soil, taking these steps ensures you’re laying down the red carpet properly for your azalea stars to shine bright in their garden performance.
Evaluating Your Garden Soil
Before you dive into the world of azaleas, taking a closer look at your garden soil is like peeking under the hood of a car before a road trip. It’s essential! Understanding the garden soil evaluation, its soil pH testing, soil texture assessment, and drainage quality can make or break your azalea gardening adventure.
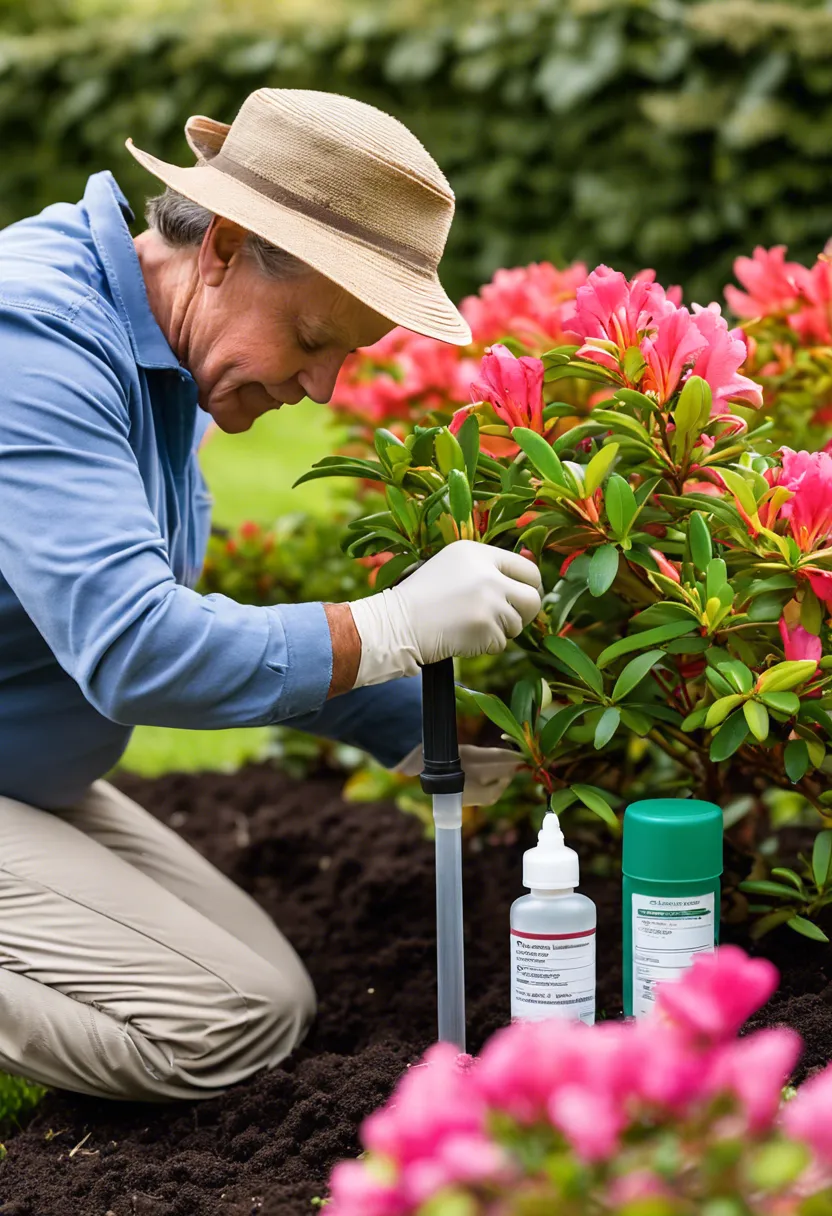
Testing the pH Level of Your Soil
Azaleas are like Goldilocks; they need everything just right, especially when it comes to soil pH. Too acidic or too alkaline, and they’ll throw a fit. This is where soil pH testing steps in as your gardening best friend. Grabbing a home pH testing kit from your local garden store or opting for professional soil testing services can save you from a world of hurt later on.
Testing isn’t rocket science. With a home kit, you’re basically playing detective with your soil – digging up a sample, mixing it with water or a provided solution, and comparing the color change to a chart. If you’re scratching your head at this point, professional services might be more up your alley. They can give you the lowdown on what’s happening beneath the surface.
Now, if your soil’s pH levels are off-kilter, don’t panic! Adjusting soil pH is like tweaking a recipe to taste just right. If it’s too acidic, adding lime can sweeten things up. Too alkaline? Sulfur will sour it down to azalea-friendly levels. Remember, patience is key here; changes won’t happen overnight but think of it as investing in future blooms.
Assessing the Texture and Drainage of Your Soil
Imagine planting your azaleas in the equivalent of a cashmere sweater – that’s what ideal soil texture feels like for these plants. Not too clumpy and heavy like clay but not too sandy either; something in between that holds moisture but doesn’t get waterlogged.
To play detective with your soil’s texture, get hands-on literally. Scoop up some wet soil and give it a squeeze. If it forms a ball that crumbles easily when poked, congratulations! You’ve hit the texture jackpot for azaleas. For drainage evaluation, nature offers an easy test: observe how quickly water drains after rainfall. If puddles linger longer than they should (imagine counting to 30), consider improving drainage before planting.
Improving drainage might sound daunting but think of it as setting up the perfect bed for your azaleas to sleep in – cozy but not soggy. Mixing in organic matter can help both sandy soils hold onto moisture better and heavy clay soils drain faster. It’s all about creating that “just right” environment where azaleas can thrive without getting their feet too wet or too dry.
Step-by-Step: Preparing Your Garden Soil for Azaleas
Getting your garden soil ready for azaleas isn’t rocket science, but it does require a bit of elbow grease and know-how. Azaleas are like the divas of the plant world; they have specific needs that must be met if you want them to perform at their best. Let’s break down the steps to create the perfect environment for these beautiful bloomers.
-
Test your soil’s pH level. Azaleas thrive in acidic soil with a pH between 4.5 and 6.0. You can grab a test kit from your local garden center or online. If you find out your soil is more “alkaline” than an ’80s rock band (meaning it has a pH above 7), don’t worry, we’ve got you covered in the next steps.
-
Amend the soil if necessary. If your soil test shows that your garden is not quite acidic enough for azaleas, it’s time to bring in the reinforcements—sulfur or organic mulches like pine needles or shredded leaves can help lower the pH over time. Remember, changing soil pH isn’t an overnight job, so patience is key here.
-
Dig a hole that’s as deep as the root ball of your azalea but twice as wide. This gives roots room to spread out and makes it easier for them to absorb water and nutrients.
-
Mix some organic matter into the excavated soil. Azaleas love rich, well-draining soil, so mixing in compost or aged manure will give them a happy home base from which to grow.
-
Plant your azalea so that the top of the root ball is slightly above ground level when placed in the hole. This helps prevent waterlogging, which azaleas hate more than cats hate baths.
-
Water thoroughly after planting, giving your azalea a good drink to settle any air pockets around its roots.
-
Mulch around but not on top of your azalea with an organic material like pine bark or straw to keep moisture in and weeds out while maintaining that all-important acidic environment.
And there you have it! By following these steps, you’re setting up your garden—and your future azaleas—for success by creating just the right kind of cozy spot they need to thrive and dazzle with their vibrant blooms.
Amending the Soil for Azaleas
When it comes to preparing garden soil for azaleas, think of yourself as a chef. Just like a gourmet dish requires the right balance of ingredients, azaleas need their soil just so – with perfect pH, drainage, and texture.
Adjusting the pH Level
Azaleas are like that picky eater we all know; they thrive in acidic soil. The magic number? A pH between 4.5 and 6.0. But how do you make sure your garden hits that sweet spot? First things first, you’ve got to test the soil. Grab a soil testing kit from your local garden center or send a sample to an extension service. It’s like doing a little detective work for your garden.
Found out your soil is more basic than a pumpkin spice latte in fall? Time to acidify! Adding elemental sulfur is one way to lower the pH. Think of sulfur as the sour candy that brings down the sweetness level of your soil’s pH. But remember, patience is key; changes don’t happen overnight.
On the flip side, if your soil is too acidic (yes, there’s such a thing), lime can be your best friend. Lime acts like a neutralizer, toning down acidity and bringing balance back to your azalea’s home environment.
Remember, adjusting soil pH isn’t a one-and-done deal; it’s more like tuning an instrument before every concert. Regular testing and adjusting ensure that your azaleas have the perfect stage to perform their best.
Improving Drainage and Texture
Imagine wearing wet socks all day; sounds uncomfortable, right? That’s how azaleas feel in poorly drained soils. Proper drainage ensures that water moves through the soil efficiently, preventing root rot and other moisture-related issues.
If you’re dealing with heavy clay soil, think of it as too much dough in your cookie recipe – it needs loosening up! Mixing in organic matter like compost or aged manure can improve both drainage and texture by breaking up dense particles and adding air pockets.
Got sandy soils? While they drain well (sometimes too well), they often lack nutrients and structure. Adding organic matter here works wonders too by retaining moisture and providing essential nutrients.
And let’s not forget about mulching – it’s like putting a cozy blanket over your azalea beds. Mulch helps retain moisture, suppress weeds, and gradually improves soil texture as it breaks down.
So there you have it: adjusting pH levels and improving drainage and texture are key steps in preparing garden soil for azaleas. With these tips under your belt, you’re well on your way to creating an azalea paradise in your garden.
Ongoing Care for Healthy Azalea Growth
Now that you’ve got your azaleas snug in their garden beds, it’s time to talk about keeping them happy and blooming like there’s no tomorrow. Think of this as the TLC your azaleas need to strut their stuff. Let’s dive into the nitty-gritty of ongoing care without making it feel like rocket science.
-
Watering: Azaleas are a bit like Goldilocks; they don’t want too much or too little water, but just right. Aim for moist soil, not soggy or bone-dry. During hot spells, they might need a drink more often, but don’t turn their roots into a swamp.
-
Mulching: Throw down some mulch around your azaleas to keep them cool and moist. It’s like giving them a comfy blanket that also keeps the weeds at bay. Just make sure the mulch isn’t piled up against their stems like a mountain.
-
Fertilizing: Feed your azaleas with a fertilizer made just for them in early spring, right before they start putting on their show. It’s like giving them a pep talk and all the snacks they need to perform their best.
-
Pruning: After your azaleas have finished blooming, give them a little haircut if they’re getting too wild. This isn’t about creating topiary masterpieces but removing dead branches and shaping them up so they can grow even prettier next year.
-
Pest and Disease Management: Keep an eye out for uninvited guests like lace bugs or azalea caterpillars that want to crash the party. If you spot trouble, reach for organic solutions first to keep things friendly for bees and butterflies hanging around your garden.
Common Mistakes When Preparing Soil for Azaleas
Avoiding common pitfalls is crucial when preparing garden soil for azaleas. Over-enthusiasm with fertilizer and overlooking the importance of drainage can turn your gardening dream into a nightmare.
Over-fertilizing the soil
Azaleas are like that friend who gets overwhelmed if you do too much for them. Dumping a ton of fertilizer on them, thinking it’ll make them bloom like crazy, actually does more harm than good. It’s like feeding them a triple-layer chocolate cake every day – eventually, it leads to fertilizer damage in azaleas, including root burn and a sad lack of flowers. They start showing signs of over-fertilization, such as leaf burn or a sudden stop in growth, which is their way of saying, “Please, no more!”
But don’t fret! The trick isn’t to stop feeding them but to do it right. Opt for organic fertilizers for azaleas that release nutrients slowly and gently, just how they like it. This means checking the label and applying only what’s recommended, or even less if you’re unsure. It’s about finding that sweet spot where your azaleas get just enough food without feeling stuffed.
Ignoring soil drainage
Imagine wearing wet socks all day; that’s how azaleas feel with poor drainage – uncomfortable and prone to all sorts of problems. Proper soil drainage is non-negotiable for these beauties because soggy roots lead to root rot faster than you can say “azalea”. If your plants are looking unhappy or their leaves are turning yellow without reason, chances are they’re sending an SOS about symptoms of poor drainage.
To turn things around, think about improving garden drainage by adding materials like perlite or sand to the soil mix. These act like little sponges that hold onto moisture just long enough before letting excess water drain away. Creating raised beds or installing a simple French drain system can also work wonders in keeping those roots happy and healthy. Remember, happy roots equal blooming azaleas!

To Wrap Up
In the journey of Preparing Garden Soil for Azaleas, we’ve discovered that it’s not just about digging a hole and plopping in a plant. It’s a labor of love involving soil testing, pH adjustments, and careful selection of organic matter.
Remember, azaleas thrive in acidic soil rich in organic matter. So don’t skimp on the compost or peat moss!
Lastly, patience is key. Your azaleas may not bloom overnight but with proper care and preparation, they’ll reward you with stunning blooms for years to come. Now go get your hands dirty!