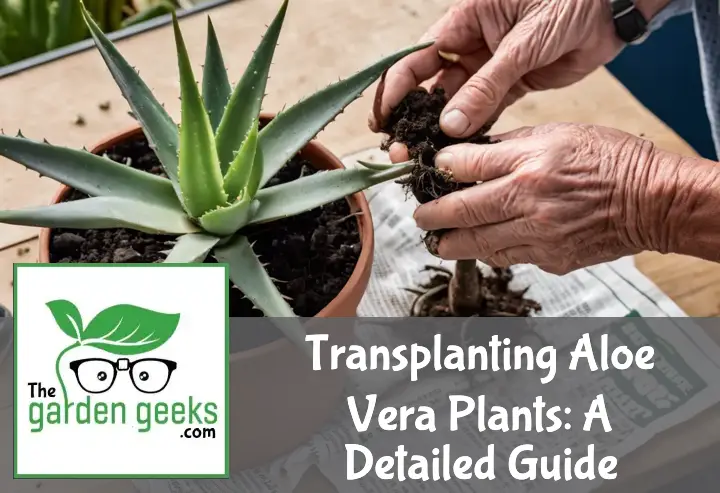
Welcome to the world of Transplanting Aloe Vera Plants! If you’re here, it means you’re ready to dive into the process of giving your aloe vera a new home.
In this guide, we’ll unravel the mystery behind transplanting aloe vera plants. We’ll break down the steps in an easy-to-follow manner that even beginners can understand.
So, buckle up and prepare for an exciting journey into the realm of aloe vera transplantation. Keep reading about Transplanting Aloe Vera Plants!
Key Takeaways
- Aloe Vera plants are easy to transplant, but timing is key. Best time? Spring or early summer.
- Choose a pot that’s just slightly larger than the root ball. Too big and it’ll drown!
- Use a well-draining soil mix. Aloe Vera hates wet feet.
- When removing the plant, be gentle! You don’t want to damage those precious roots.
- After transplanting, wait a week before watering. This helps prevent root rot.
- Finally, place your newly transplanted Aloe Vera in bright, indirect sunlight and watch it thrive!

Understanding Aloe Vera Plants
Aloe Vera plants are fascinating creatures of the plant kingdom, thriving in conditions that would make most other plants wave the white flag. They’re not just plants; they’re survivors, equipped with unique features to conquer harsh environments. This section is your golden ticket to mastering Aloe Vera care guide, turning you into a green thumb guru.
The Biology of Aloe Vera
Aloe Vera, a succulent plant species from the genus Aloe, is quite the show-off with its thick, fleshy leaves filled with a gel-like substance. It’s this clever adaptation that allows it to store water, making it a drought-tolerant VIP in the plant world. Unlike your average houseplant, Aloe Vera has mastered the art of survival in arid conditions thanks to its succulent nature.
The secret sauce to an Aloe’s success lies in its leaves, which are packed with water reserves to help it through dry spells. These aren’t just any leaves; they’re equipped with specialized cells for water storage in Aloe leaves, ensuring they stay plump and hydrated without frequent watering. But wait, there’s more! Aloes are capable of photosynthesis in Aloes under low light conditions – a rare talent that sets them apart from their plant peers.
With over 500 types of Aloe plants, there’s an impressive variety within this species. Each type brings something unique to the table, but all share common traits that define their care needs. Understanding these succulent superpowers is crucial for anyone diving into succulent plant care.
Ideal Growing Conditions for Aloe Vera
To keep your Aloe Vera basking in bliss, start by placing it in a bright spot where it can soak up some indirect sunlight. These sun-loving succulents crave light but prefer not to be scorched by direct rays – think of them as sunbathers who forgot their sunscreen.
Next up: soil. Not just any dirt will do; Aloes favor well-draining soil that mimics their natural arid habitats. Opting for a sandy or gritty mix will make your Aloe as happy as a clam at high tide, ensuring those roots don’t sit in moisture too long.
Watering routines for these desert dwellers should be infrequent but thorough – imagine giving them a good gulp after a long dry spell rather than sips here and there. Let the soil dry out completely between waterings to prevent root rot and keep your plant thriving.
When it comes to temperature preferences, think warm thoughts. Aloes enjoy basking in temperatures between 55-80°F (13-27°C), making them perfect companions for indoor gardeners looking to add a touch of greenery without the fuss of high maintenance care.
Common Problems with Aloe Vera Growth
Overzealous watering is often where things go south for these drought-resistant darlings. Signs of overwatering include soft, mushy leaves or discoloration. The solution? Ease up on the H2O and let that soil dry out before giving your plant another drink.
Pests can also crash the party, bringing unwanted stress to your serene succulent scene. Mealybugs and spider mites are common culprits but fear not; regular inspections and prompt action can keep these pesky intruders at bay.
Lastly, diseases like root rot or fungal infections could spell trouble if left unchecked. Prevention is key here – maintaining proper watering habits and ensuring good air circulation around your plant will help keep these ailments at arm’s length.
Why Transplanting is Necessary for Aloe Vera Plants
Transplanting Aloe Vera Plants isn’t just about giving them a new home; it’s about ensuring they continue to thrive. Overcrowding, the need for more space, and disease or pest issues are all compelling reasons to consider giving your green buddy a fresh start.
Overcrowding in the Original Pot
Ever noticed your aloe vera looking a bit cramped? That’s overcrowding for you. It’s like trying to fit into jeans two sizes too small – uncomfortable and not very healthy. Signs of plant overcrowding include roots poking out of the pot’s drainage holes or circling the surface because they’ve got nowhere else to go. This root bound scenario spells trouble, leading to stunted growth and a sad, struggling plant.
Giving your aloe vera more room is like upgrading from a cramped apartment to a spacious house. The benefits of spacious pots for aloe can’t be overstated. More room means roots can spread out, breathe, and absorb nutrients better, leading to an overall happier and healthier plant. Think of repotting aloe vera plants as helping them put their best leaf forward.
Need for Larger Growing Space
As aloes grow, they’re like teenagers – suddenly needing more room than you thought possible. A larger growing space allows them not just to grow up but out, developing a robust root system that supports lush, vibrant leaves. But choosing the right pot size isn’t about going from small to gigantic overnight. It’s about finding that sweet spot where your plant has room to grow without drowning in excess soil.
The material of the pot matters too. Terra cotta breathes better than plastic, promoting healthy roots by allowing air and moisture to move through the soil more efficiently. And let’s not forget about ensuring proper drainage in new pots, which is crucial for preventing waterlogged roots that could spell disaster for your succulent friend.
Disease or Pest Infestation
Imagine waking up one day covered in bugs; not pleasant, right? Well, your aloe vera feels the same way about pests. Diseases and pests can turn your thriving plant into a withering mess if left unchecked. Transplanting Aloe Vera Plants offers an excellent opportunity to give them a health check-up and move them away from contaminated soil or pots that might harbor these unwelcome guests.
During transplantation, inspecting the roots and leaves for signs of distress is key. Spotted something funky? Don’t panic! Removing affected areas and using sterile pots can help get things back on track. Keeping an eye on your plant after repotting will also ensure any lingering issues don’t turn into full-blown problems, keeping your green companion happy and healthy.
Preparing for the Transplant Process
Before diving into the world of transplanting aloe vera plants, let’s gear up with some groundwork. Think of it as prepping your aloe for a big move – it’s all about timing, the perfect pot, and soil that screams “home sweet home”.
Choosing the Right Time to Transplant
Timing isn’t just everything; it’s the only thing when it comes to giving your aloe vera plant a new crib. You see, these succulent buddies have their own calendar, and tapping into that schedule can mean the difference between thriving and barely surviving.
Springtime is like a green light for these plants. It’s when they’re gearing up for growth spurt season, making it the ideal window for transplanting. Summer can work too, but think early summer, before the scorching heat tells your aloe to hit pause on growing.
Fall? Sure, if you’re in a milder climate. But winter is a no-go zone. It’s when your plant is dreaming of warmer days and not in the mood to settle down in new digs.
So, mark your calendars! Late spring through early summer is prime time for transplanting aloe vera plants. This period ensures minimal stress on your green friend and sets the stage for some serious leafy expansion.
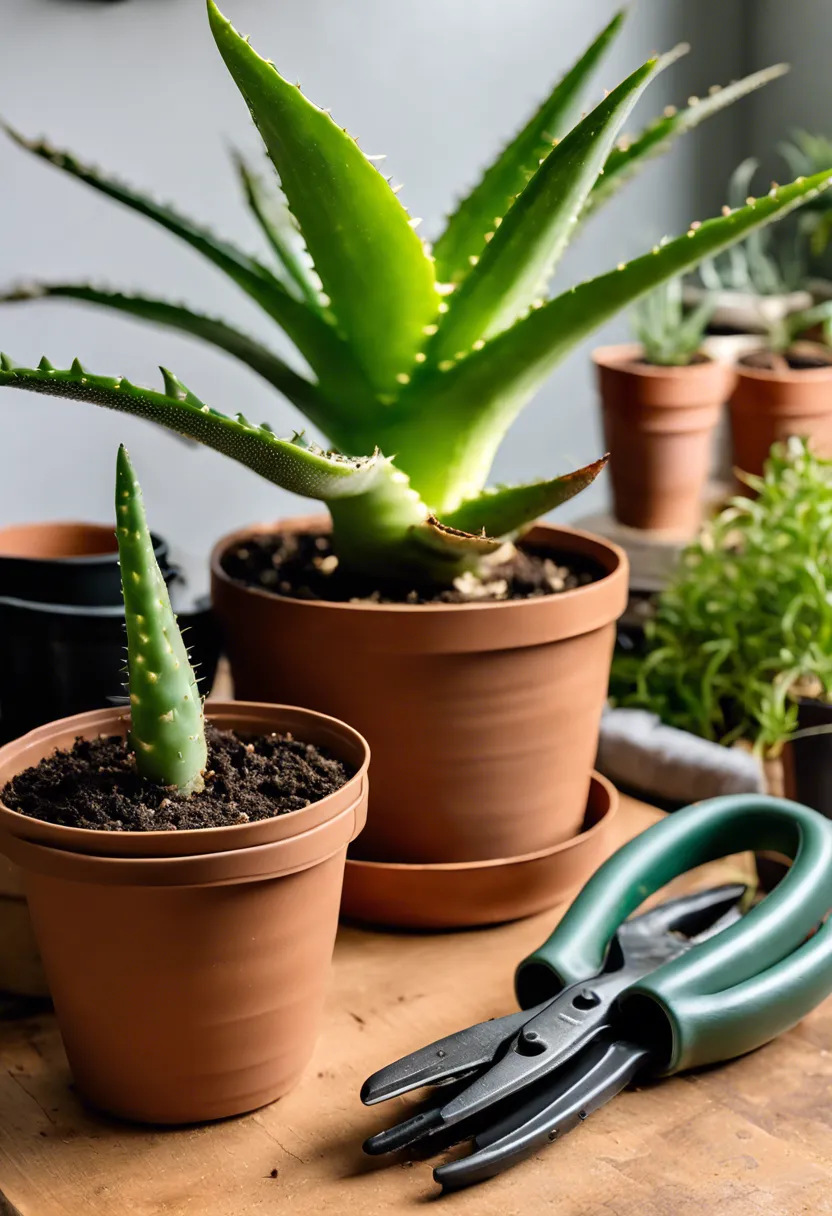
Selecting a Suitable New Pot
Now let’s talk about upgrading your plant’s living situation. Size matters here – but bigger isn’t always better. Aim for cozy but comfortable; think about giving your plant room to grow without drowning in space.
Material-wise, terracotta or ceramic pots are like luxury condos for aloes because they allow roots to breathe and prevent water from overstaying its welcome. Plastic can work in a pinch but remember – good drainage trumps all.
Speaking of drainage, don’t skip this part. A pot with proper drainage holes at the bottom is non-negotiable unless you fancy root rot as an unexpected roommate.
Preparing the Soil Mix
Imagine baking a cake but for your plant – that’s what mixing soil feels like. The right blend will make sure your aloe vera planting tips don’t go to waste by providing essential nutrients and preventing water from throwing a pool party around your plant’s roots.
Start with two parts potting soil mixed with one part perlite or coarse sand; this creates an airy environment that roots love. Throwing in some organic matter like compost can give your mix an extra boost of nutrients.
Now roll up those sleeves because it’s mixing time! Combine these ingredients thoroughly until you have what looks like the VIP lounge of soils – inviting yet sophisticated enough to promote healthy growth without waterlogging issues.
By following these steps carefully, you’re not just preparing soil for aloe vera; you’re setting up an oasis where it can flourish post-transplantation.
Step-by-Step: How to Transplant an Aloe Vera Plant
Transplanting your aloe vera plant might seem like a task for the green-thumbed elite, but fear not! With these simple steps, even those of us who haven’t quite mastered keeping our houseplants alive can successfully give our aloe a new home. Let’s break it down into manageable chunks, shall we?
-
Choose the right time: Spring or early summer is the best time to transplant aloe vera. This gives the plant plenty of time to adjust before the cooler months.
-
Select a new pot: Make sure it’s slightly larger than the current one and has good drainage holes. A terracotta pot is ideal because it allows the soil to dry out more efficiently between waterings.
-
Prepare your potting mix: A well-draining mix is crucial. You can buy cactus mix from your local garden store or make your own by mixing regular potting soil with sand or perlite.
-
Remove the plant: Gently take your aloe out of its current pot. Be careful not to damage its roots! If it’s stuck, tap the sides of the pot or run a knife around the edge to loosen it.
-
Inspect and trim: Once you have your plant out, check for any dead or damaged roots and leaves. Use clean scissors or pruning shears to remove them.
-
Fill the new pot: Add some of your prepared soil mix to the bottom of the new pot so that when you place your plant in, its base will be at the same level it was in its old home.
-
Position your aloe: Carefully place your plant in the center of the new pot and fill around it with more soil mix, leaving about an inch of space at the top for watering.
-
Water: After transplanting, give your plant a good drink to help settle any air pockets in the soil. Then, let it dry out completely before watering again.
-
Wait before returning to full sun: Keep your newly transplanted aloe in indirect light for about a week to help it recover from any transplant shock without getting sunburned.
And there you have it! By following these steps, you’ve not only given your aloe vera plant a fresh start but also ensured that it has everything it needs to thrive in its new environment.
Post-Transplant Care for Aloe Vera Plants
After transplanting aloe vera plants, it’s crucial to give them the TLC they need to thrive. This means getting their watering and feeding schedule just right and keeping an eye on their growth and health.
Watering and Fertilizing Schedule
Watering your newly transplanted aloe vera correctly is like hitting the jackpot for its survival. Initially, keep the soil slightly moist but not waterlogged to prevent the dreaded root rot. After the first week, let the topsoil dry out completely before giving it another drink. This optimal watering frequency for aloe ensures your plant gets enough hydration without drowning its roots.
Now, let’s talk food. Your aloe doesn’t need much—think of it as a low-maintenance diner. Start fertilizing about a month after transplanting, allowing your plant to settle in first. Use a half-strength balanced fertilizer every six weeks during the growing season. Remember, choosing the best fertilizer for aloe vera means opting for something light on nitrogen but rich in phosphorus and potassium, supporting healthy growth without overwhelming your plant.
Monitoring Growth and Health
Seeing your aloe vera flourish post-transplant is like watching your favorite series unfold with no plot twists—satisfying and reassuring. Healthy growth means firm, green leaves that stand upright without any discoloration or spots. If you notice slow growth or pale leaves, this could be a sign of inadequate light or overwatering.
Keep an eye out for common issues such as droopy leaves or brown tips, which can indicate either too much sun or inconsistent watering schedules. Adjust accordingly by moving your plant to a shadier spot or stabilizing its watering routine. For more serious problems like root rot indicated by mushy bases or severe leaf discoloration, you may need to consider transplanting aloe vera plants again into fresh soil with better drainage.
Remember, patience is key when nurturing your transplanted aloe vera back to health. With careful monitoring and adjustments based on what you observe, you’ll have a thriving plant adding life and greenery to your space in no time.
Preventive Measures to Ensure Successful Transplant
Before you get your hands dirty and dive into the world of aloe vera transplantation, let’s make sure you’re armed with some crucial tips to avoid turning your green-thumb adventure into a plant horror story. These preventive measures are like the secret sauce for ensuring your spiky friend thrives in its new home.
-
Choose the right time: Timing is everything! Spring or early summer gives your aloe vera the best shot at success since it’s actively growing during these seasons.
-
Select an appropriate pot: Bigger isn’t always better. Go for a pot that’s just slightly larger than the root ball of your plant. This helps prevent excess moisture from hanging around and giving root rot an invitation.
-
Use well-draining soil: Aloe vera loves to keep its feet dry. Mix in some perlite or sand with regular potting soil to make sure water runs through faster than kids at a sprinkler park.
-
Be gentle with the roots: Treat those roots like fine lace. Gently tease them apart if they’re tangled, and avoid breaking them as much as possible. Think of it as performing delicate surgery on your plant baby.
-
Water wisely post-transplant: After transplanting, hold off on watering for about a week to allow any damaged roots to heal. It’s like giving them time to put on their battle armor against rot.
-
Provide plenty of light but not direct sunlight immediately: Like us getting out of bed, plants need time to adjust. Place your transplanted aloe in bright, indirect light initially before gradually introducing it to more direct sunlight.
-
Monitor closely for pests: Keep an eye out for uninvited guests trying to crash the party. Pests love stressed plants, so inspect regularly and act fast if you spot troublemakers.

To Wrap Up
Transplanting Aloe Vera Plants doesn’t have to be a daunting task. With the right knowledge, you can ensure your succulent thrives in its new home. Remember, timing is key and the right potting mix can make all the difference.
Don’t forget about proper aftercare! Proper watering and positioning your plant for optimal sunlight are crucial steps not to be overlooked.
In conclusion, take a leap of faith and start Transplanting Aloe Vera Plants today. Your green thumb is just waiting to be discovered!