Ever wondered about Growing Aloe Vera from Seeds? Well, you’re in the right place! This beginner’s guide will take you through the simple steps to grow your own Aloe Vera plant from seeds.
Aloe Vera is a versatile plant that offers numerous health benefits and adds a touch of greenery to your home or garden. Plus, it’s relatively easy to grow, even for those without a green thumb!
So, why not give it a try? Keep reading about ‘Growing Aloe Vera from Seeds’ and let’s embark on this exciting gardening journey together.
Key Takeaways
- Growing Aloe Vera from seeds is a fun, easy project for beginners.
- Start by choosing a well-draining soil mix and plant your seeds about 1 inch deep.
- Keep the soil moist but not waterlogged, and place the pot in a warm, sunny spot.
- Be patient! It can take several weeks for your seeds to germinate.
- Once they sprout, keep them in indirect sunlight until they’re strong enough to handle direct sun.
- Remember, Aloe Vera loves the sun but hates overwatering.

Understanding Aloe Vera
Dive into the world of Aloe Vera, a plant that’s not just a pretty face but a powerhouse of benefits. Whether you’re eyeing to add a green touch to your home or harness its health perks, understanding the basics is your first step towards growing Aloe Vera from seeds.
What is Aloe Vera?
Aloe Vera is like the Swiss Army knife of the plant kingdom; versatile and packed with benefits. Botanically speaking, it’s a succulent, meaning it thrives in dry conditions by storing water in its leaves. These fleshy leaves are where all the magic happens, loaded with a gel that’s been celebrated across cultures for its healing properties.
Transitioning from its botanical characteristics, the uses of Aloe Vera are as diverse as they come. From soothing sunburns to moisturizing skin and even purifying air, this plant has carved out a significant place in beauty products, herbal remedies, and even beverages. Its significance spans various industries, making it more than just an ornamental plant; it’s a cultural icon in wellness and natural healing.
Benefits of Growing Aloe Vera
Imagine having a live-in doctor, beautician, and air purifier all rolled into one green package. That’s what growing Aloe Vera at home offers. Health-wise, it’s like hitting the jackpot; topical application can soothe burns, cuts, and other skin ailments thanks to its anti-inflammatory properties.
On the aesthetic front, Aloe Vera plants add a sleek, modern touch to any space. Their architectural form brings an element of sophistication while purifying the air you breathe. It’s not just about looks; these plants work hard to improve your living environment.
And let’s not forget their environmental impact. As drought-resistant plants, Aloes play nicely with eco-friendly gardens requiring minimal water. This ease of growing makes them perfect for green thumbs looking to reduce their environmental footprint without sacrificing garden aesthetics.
Ideal Conditions for Growing Aloe Vera
To turn your thumb greener with Aloe Vera, start with the soil – well-draining is non-negotiable. Think cactus potting mix or sandy loam that allows moisture to escape quickly because soggy soil and Aloe roots are sworn enemies.
Temperature-wise, these succulents enjoy basking in warmth ranging from 55°F (13°C) at night to 80°F (27°C) during daytime hours. They’re sun worshippers but appreciate some shade during peak intensity hours to avoid sunburn—yes, plants get sunburned too!
Sunlight needs are straightforward: bright but indirect light is ideal for fostering growth without causing harm. Lastly, watering practices hinge on moderation; allow the soil to completely dry between waterings to mimic their natural arid habitat conditions effectively.
Getting Started with Aloe Vera Seeds
Diving into the world of growing Aloe Vera from seeds? Great! You’re about to embark on a rewarding journey. Let’s kick things off by figuring out where to get your hands on some seeds and how to pick the cream of the crop.
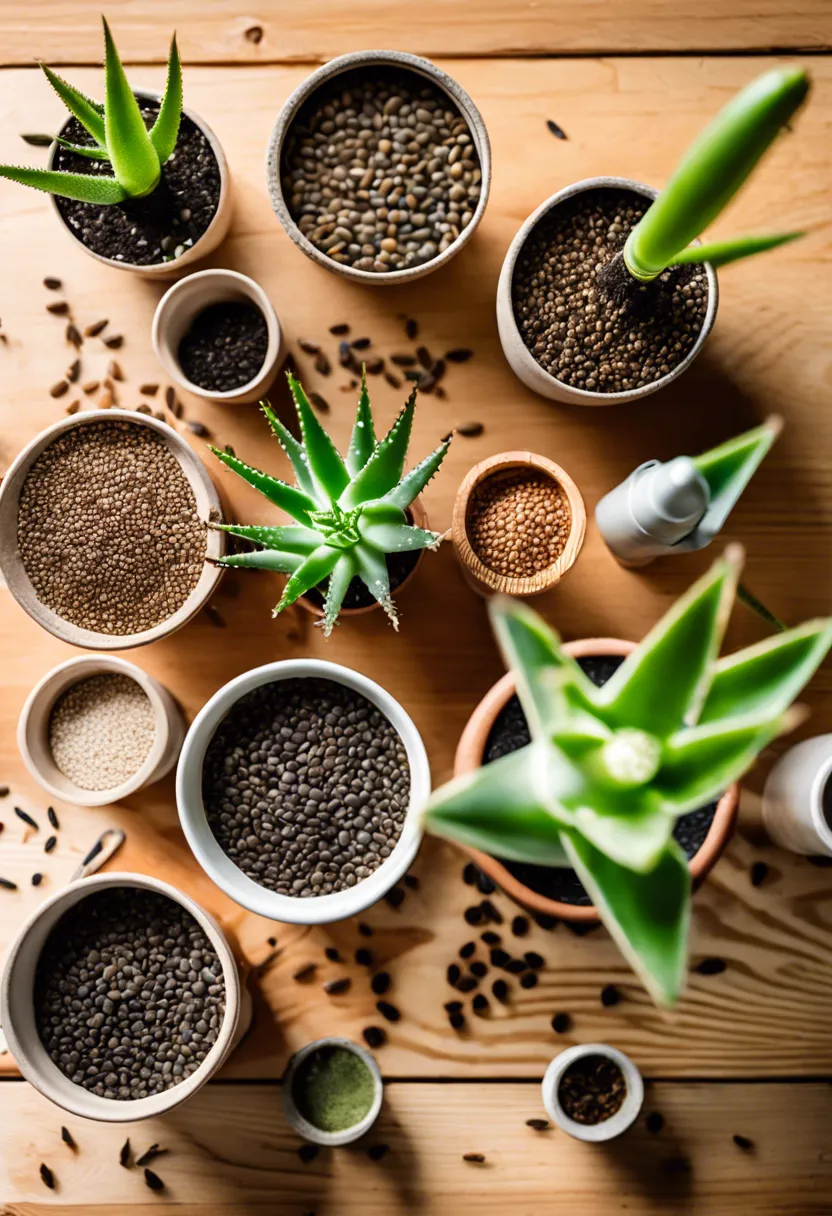
Where to Buy Aloe Vera Seeds
So, you’ve decided to grow your own Aloe Vera jungle from scratch? First step: snagging those seeds. The internet is your oyster when it comes to buying Aloe Vera seeds online. With just a few clicks, you can have them delivered right to your door. But hey, not all that glitters is gold. Make sure you’re ordering from reputable seed suppliers that have rave reviews and a good track record.
If surfing the web isn’t your thing, local garden centers selling Aloe seeds might be more up your alley. These places often have knowledgeable staff who can give you tips on what exactly you’re buying. Plus, it’s always nice to support local businesses!
For those who are looking for something a bit more specific, like organic Aloe Vera seeds, specialty gardening stores are where it’s at. These shops tend to carry a wider variety of seeds, including those hard-to-find ones for the connoisseurs among us.
Remember, not all sellers are created equal. Stick with those who have a reputation for quality because let’s face it, nobody likes getting dud seeds.
Choosing High-Quality Seeds
Alrighty, now that you know where to hunt for these tiny treasures, let’s talk quality control. Not all Aloe Vera seed starting adventures are created equal and much of your success hinges on the quality of the seeds you plant.
First off, take a gander at what those seeds look like. High-quality Aloe seeds should be plump and uniform in color; any signs of wrinkling or discoloration could mean they’re past their prime.
Check out the packaging date too. Freshness matters because as time ticks by, seed germination rates can plummet faster than my motivation levels on a Monday morning.
And don’t forget about reputation – if other green thumbs give a seller two green thumbs up for their high-quality Aloe seeds, chances are you’re onto a winner.
Lastly, think about where you’re going to stash these babies until planting day rolls around. Optimal storage conditions for seeds aren’t rocket science: cool, dry places away from direct sunlight will keep them happy as Larry until it’s go-time.
Step-by-Step: Planting and Germinating Aloe Vera Seeds
Now that you’ve got your aloe vera seeds, it’s time to turn those tiny promises of green into thriving plants. Don’t worry if you’ve never done this before; consider this your foolproof guide to getting those seeds to sprout and grow. We’ll walk through each step together, making sure no detail is overlooked.
-
Gather supplies: First things first, you’ll need a shallow planting tray or small pots with drainage holes, succulent or cactus potting mix, sand (optional), water, and a warm, sunny spot. Oh, and don’t forget your aloe vera seeds!
-
Prepare the soil: Mix the succulent or cactus potting mix with a bit of sand to improve drainage. This step ensures your aloe babies won’t sit in too much water and rot away. Fill your trays or pots with this mixture, leaving about an inch of space at the top.
-
Sow the seeds: Sprinkle the aloe vera seeds evenly over the surface of the soil. They’re like little treasures waiting to be buried! Now cover them with a thin layer of either more potting mix or fine sand—just enough so they’re hidden from view but not so deep they can’t find their way out.
-
Water gently: Using a spray bottle or gentle watering can, moisten the soil evenly. Think of it as giving your seeds their first sip of life—a nice drink but not a flood! The goal is damp soil, not soggy.
-
Cover up: If you have a clear plastic cover for your tray or individual pots, now’s the time to use it. This acts like a mini greenhouse, keeping moisture in and helping create that cozy environment seeds love for germination. No cover? No problem! A piece of clear plastic wrap secured with some elastic bands works just as well.
-
Warmth is key: Place your seeded trays or pots in a warm spot that gets indirect sunlight. Seeds need warmth more than direct sun at this stage—think cozy blanket rather than beach vacation.
-
Patience and care: Keep an eye on your seeds over the next few weeks; they’ll need consistent moisture but not too much waterlogging. If you see condensation building up under the cover, lift it slightly every now and then for air circulation.
-
First signs of life: In about 2-4 weeks (patience is indeed a virtue here), you should see tiny green shoots poking through the soil—a thrilling moment for any plant parent! Once these sprouts appear, remove any covering so they don’t get too humid and start introducing more direct sunlight gradually.
-
Thinning out: As your seedlings grow, give them room by thinning out overcrowded areas gently pulling out weaker plants (a tough love moment). This ensures stronger seedlings have enough space to thrive.
And there you have it! You’ve successfully navigated through planting and germinating aloe vera seeds—each step bringing you closer to having beautiful, home-grown aloes adding life to your space.
Caring for Your Seedlings
Caring for your aloe vera seedlings is like babysitting. You’ve got to be attentive, but not too overbearing. Let’s dive into the essentials of Aloe vera seedling care, from watering to transplanting.
Watering Requirements for Young Plants
Watering aloe vera seedlings is a fine art. Too much love in the form of water, and you’ll drown them. Too little, and they’ll dry out faster than your favorite plant meme. The key is maintaining just-right moisture levels for young plants. Start with well-draining soil to avoid waterlogging their tiny roots.
Now, let’s talk signs. If your plant starts throwing a fit by dropping leaves or looking wrinkled, it’s screaming for water. That’s underwatering symptoms 101. On the flip side, if the leaves are swollen and mushy or if you see mold taking up residence, you’ve entered the signs of overwatering zone. Adjust your watering strategy accordingly to keep those baby aloes happy.
Light and Temperature Needs of Seedlings
Seedlings are like Goldilocks; they need everything just right, especially when it comes to light and temperature. They love bright, indirect sunlight. Direct sun can be too harsh, giving them the equivalent of a bad sunburn. If you’re growing indoors, find a sunny window or consider using grow lights to mimic their ideal conditions.
Temperature-wise, think comfortable room temperature – between 60°F and 80°F (15°C-27°C). Anything colder can make them shiver (not literally), while hotter conditions might stress them out. If your outdoor garden turns into a sauna in summer or a freezer in winter, bring those babies indoors where you can control their climate better.
Transplanting Seedlings
When your seedlings start looking like they’re wearing clothes two sizes too small, it’s time to move them into bigger digs. Wait until they’re about 3-4 inches tall or have several sets of true leaves – that’s their way of telling you they’re ready.
First off, choose a sunny day for the big move to reduce stress on the plants. Gently tease out each seedling from its starter home with a spoon or similar tool – think surgical precision here to avoid damaging delicate roots. Plant them in their new pots or garden spot with well-draining soil mix and give them a good drink of water.
After transplanting, keep an eye on them like they’re toddlers on a playground – ensure they get enough water (but not too much) and protect them from extreme weather until they’re settled in their new space. Avoid common mistakes like planting too deep or forgetting post-transplant care; these can set back their growth.
By following these steps carefully when transplanting Aloe vera seedlings, you’ll help ensure your aloes grow up strong and healthy – ready to soothe burns, beautify spaces, and maybe even start their own families of baby aloes someday!
Troubleshooting Common Problems in Growing Aloe Vera from Seeds
Facing challenges while growing Aloe Vera from seeds? You’re not alone. From pesky pests to daunting diseases, let’s dive into identifying and solving these green-thumb headaches.
Identifying Common Diseases and Pests
When your Aloe Vera starts looking a little under the weather, it might be time to play plant detective. Signs of Aloe Vera pests can range from tiny, moving dots on the leaves (hello, spider mites) to chewed-up edges courtesy of larger critters like snails. On the disease front, symptoms of diseases in Aloe plants often manifest as discoloration or soft, mushy spots on leaves and stems. This could signal a fungal invasion or bacterial infection.
Transitioning from diseases to pests, identifying Aloe plant health issues early can save you a lot of trouble down the line. For instance, a common pest on Aloe Vera is the mealybug, which looks like tiny cotton specks hiding in nooks and crannies. Meanwhile, diagnosing Aloe Vera diseases might reveal root rot characterized by a foul smell and blackened roots—a result of overwatering or poor drainage.
Solutions to Common Issues
Now that we’ve pinpointed our green foes let’s talk battle strategies. Preventing diseases in Aloe seedlings starts with good hygiene—think sterilized pots and fresh potting mix—and proper watering habits. Overly damp conditions are a no-go as they invite unwanted fungal guests.
For direct treatment methods, treating Aloe Vera plant diseases often involves removing affected areas with sterilized tools and applying fungicides specifically designed for succulents. As for pest management for Aloe plants, natural remedies can be surprisingly effective. Neem oil spray works wonders against a wide range of critters without harming your plant or the environment.
Remember, curing common ailments in Aloes doesn’t have to involve harsh chemicals. Sometimes, simply improving air circulation around your plants or introducing beneficial insects like ladybugs to tackle aphid problems can turn things around. Keep these tips in hand, and watch your Aloe Vera thrive!
Unordered List: Essential Tools for Growing Aloe Vera from Seeds
Growing Aloe Vera from seeds might sound like you’re trying to turn your thumb green overnight, but fear not! With the right tools in hand, you’ll be more equipped than a knight going into battle. This list is your armor and sword, ensuring that those tiny seeds transform into the lush, soothing plants we all love. Let’s get into the nitty-gritty of what you’ll need to start this green-thumb adventure.
-
Seeds: First things first, you can’t grow Aloe Vera without the seeds. Look for high-quality seeds from a reputable supplier to ensure your journey doesn’t end before it even begins.
-
Growing trays or pots: You need a home for your seeds to sprout and grow. Small growing trays or pots with drainage holes will do the trick, keeping your future aloe vera plants cozy and well-drained.
-
Potting mix: Not just any dirt will do! Get a potting mix suited for succulents or cacti. These mixes ensure proper drainage and provide the right nutrients for your seedlings to thrive.
-
Spray bottle: Baby aloes are delicate. A spray bottle will help you keep the soil moist without going overboard and drowning them. Think gentle rain, not hurricane.
-
Tweezers: Yes, tweezers! They’re perfect for handling tiny seeds and placing them precisely where they need to go in the soil. It’s like playing Operation but with real-life plant benefits.
-
Labels or markers: Keep track of what’s planted where with labels or markers. This is especially helpful if you’re planting more than one type of seed because let’s face it, all tiny green things look alike at first.
-
Grow lights (optional): If you’re not blessed with ample sunlight, grow lights can be a game-changer. They’ll give your seedlings the energy they need without resorting to sun dances or other weather-influencing rituals.

To Wrap Up
In our journey of Growing Aloe Vera from Seeds, we’ve explored the simplicity and rewards of this process. From choosing quality seeds to providing the right conditions, each step is crucial for your green venture.
Don’t forget, patience is key! Remember, it’s not just about watching a plant grow, but also nurturing a life and reaping its benefits.
So why wait? Get started with your Aloe Vera project today. You’ll be amazed at what you can achieve with a little dedication and care.