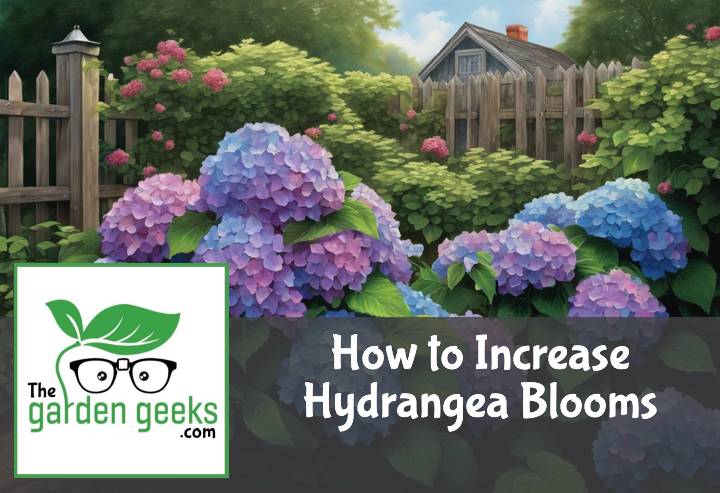
Have you ever been captivated by the stunningly vibrant hydrangeas in your neighbor’s garden and wondered how they manage to get such abundant blooms? Well, it’s not magic, but a combination of proper care and specific techniques. In this guide, we will explore how to Increase Hydrangea Blooms.
Hydrangeas are an absolute delight for any gardener with their lush foliage and large, showy flowers. But getting them to bloom profusely can be a bit tricky. However, don’t worry! With some understanding of the plant’s needs and a few tweaks in your gardening routine, you can increase your hydrangea blooms dramatically.
So let’s dive into the world of hydrangeas and learn together about these six methods that will help you transform your garden into a hydrangea haven. Keep reading about How to Increase Hydrangea Blooms (6 Methods).
Key Takeaways
- Hydrangeas love sun and shade, so find a spot that gets both.
- They’re thirsty plants, water them regularly but don’t drown ’em.
- Use compost or organic matter to enrich the soil, they’ll thank you with more blooms.
- Prune your hydrangeas in late winter or early spring for maximum flower power.
- Feed them with a slow-release fertilizer high in phosphorus to promote blooming.
- Lastly, be patient! Hydrangeas can take 2 to 3 years to really get going.

Understanding Hydrangeas
Dive into the world of hydrangeas and discover how to increase hydrangea blooms with just a bit of know-how. From soil secrets to sunlight savvy, we’ve got you covered.
The Basics of Hydrangea Plant
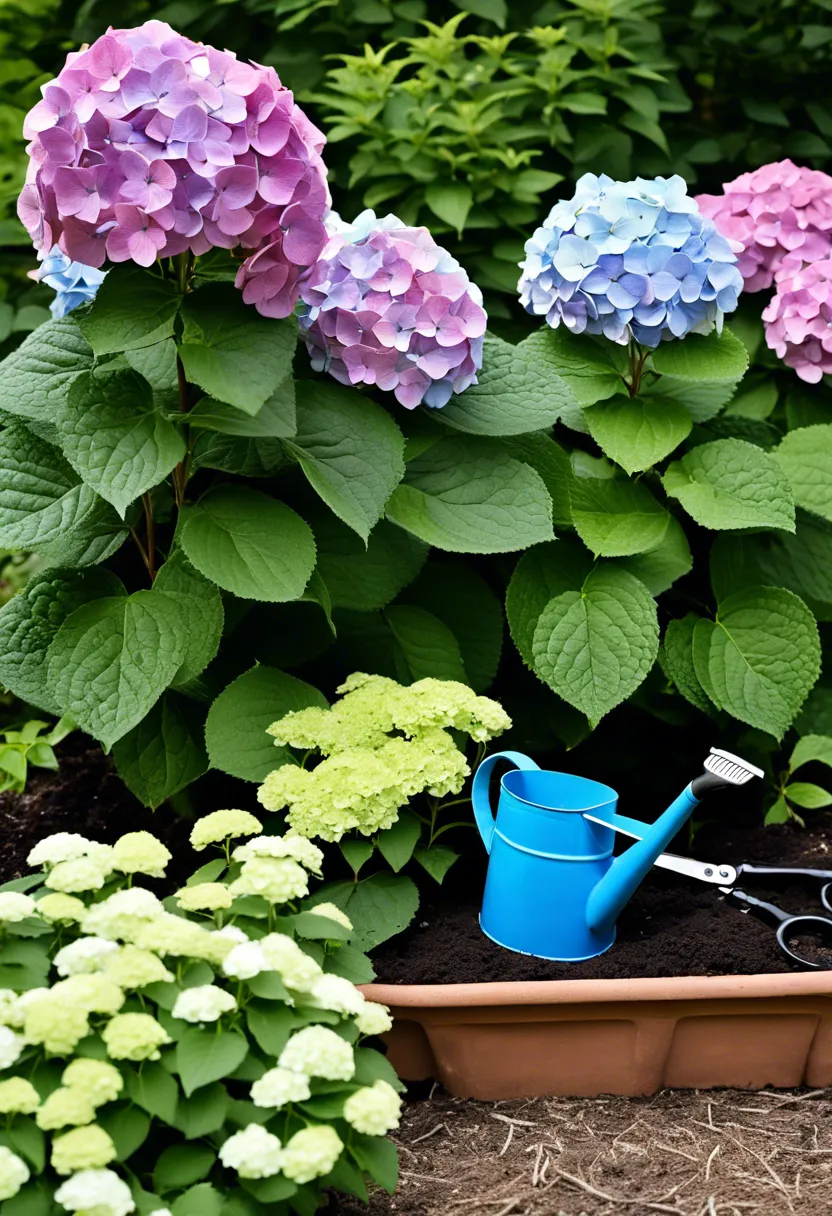
Hydrangeas are like the divas of the garden; they need everything just right. Starting with hydrangea soil requirements, these plants crave well-drained, rich earth that keeps their roots cozy and moist without drowning them. Think of it as their luxury spa retreat underground.
Watering hydrangeas is another art form. Too little and they’ll throw a fit, too much and they’re sulking in soggy shoes. Aim for a Goldilocks amount: just right. This usually means giving them a drink when the top inch of soil feels dry.
Now, let’s talk about catching some rays. Sunlight needs for hydrangeas can be a bit tricky since it’s all about balance. They love basking in the morning light but prefer to avoid the harsh afternoon sun as if it’s last season’s fashion trend. A spot with morning sun and afternoon shade will have your hydrangeas strutting their stuff in full bloom.
Different Types of Hydrangeas and Their Blooming Patterns
Not all hydrangeas are created equal, and knowing your types of hydrangeas can be your ticket to a show-stopping garden. From bigleaf to panicle, each variety has its own rhythm and style when it comes to blooming.
Bigleaf hydrangeas, for instance, are like the pop stars of the plant world, flaunting bold colors in summer. Meanwhile, oakleaf varieties offer a more subtle charm with their long-lasting flowers and stunning fall foliage.
Understanding these blooming cycles of hydrangeas is crucial for maximizing flower production. Some varieties will grace you with flowers on old wood from last year’s growth, while others strut their stuff on new wood that grows in spring.
By tuning into these flowering patterns in hydrangeas, you can tailor your care routine to encourage more blooms from each type, ensuring your garden is always ready for its close-up.
| Type of Hydrangea | Ideal Soil pH | Sunlight Requirements | Watering Needs | Best Pruning Time |
|---|---|---|---|---|
| Bigleaf (Hydrangea macrophylla) | 5.5 – 6.5 | Morning sun, afternoon shade | Keep soil consistently moist | After blooming, before August |
| Panicle (Hydrangea paniculata) | 6.0 – 7.0 | Full sun to partial shade | Deep watering once a week | Late winter or early spring |
| Smooth (Hydrangea arborescens) | 6.0 – 7.0 | Partial shade | Keep soil consistently moist but not soggy | Late winter or early spring |
| Oakleaf (Hydrangea quercifolia) | 5.5 – 6.5 | Partial sun to partial shade | Keep soil consistently moist, more tolerant of dry conditions than other types | Immediately after flowering ends, but not necessary unless shaping is desired |
| Climbing (Hydrangea anomala petiolaris) | 5.5 – 7.0 | Part sun to full shade | Moist but well-drained soil | Rarely needs pruning; trim to shape right after flowering if necessary |
| Mountain (Hydrangea serrata) | 5.5 – 6.5 | Morning sun, afternoon shade or full sun in cooler climates | Consistent moisture without waterlogging the soil | After blooming, before August similar to Bigleaf hydrangeas |
Ideal Conditions for Hydrangea Blooms
Creating paradise conditions for your hydrangeas isn’t as hard as it sounds. It starts with getting down and dirty with the ideal soil pH for hydrangeas. Did you know changing the pH can alter the color of some varieties? Acidic soils bring out blues, while alkaline soils make pinks pop.
But vibrant colors aren’t just about chemistry; they’re also about pampering your plants with love and care. Ensuring they have enough water without going overboard and protecting them from scorching sun or biting frost are key steps toward achieving those lush blooms everyone admires.
Remember, creating those perfect environmental conditions for healthy hydranegeas doesn’t happen overnight. It takes patience, observation, and maybe even a little trial and error to find what works best in your garden space.
Why Aren’t My Hydrangeas Blooming?
Wondering why your garden’s showstopper is giving you the silent treatment this season? You’re not alone. Let’s dive into the mystery of why those hydrangeas aren’t blooming and how to fix it.
Common Reasons for Lack of Blooms
First off, if you’ve been a bit too happy with the pruning shears, that might be where your problem starts. Improper pruning effects can be brutal on hydrangeas, especially if you snip away at the wrong time of year, sending potential blooms to an early grave. Then there’s sunlight – or the lack thereof. Hydrangeas are like that friend who loves the spotlight; without enough sunlight, they simply won’t perform. Aim for a sweet spot where they can bask in the glow but not get scorched.
Overdoing it with fertilizer is another no-no. While you might think you’re giving them a treat, too much of a good thing leads to lush leaves at the expense of flowers – classic over-fertilization consequences. And let’s not forget about winter’s icy grip. Some hydrangeas are drama queens when it comes to cold weather, and without proper protection, winter damage can lead to a bloomless season.
How to Identify Issues with Your Hydrangea Plant
So, you’ve got a sad hydrangea on your hands – now what? Start by playing plant detective to pinpoint the issue. Yellowing leaves could signal a nutrient deficiency, screaming for some well-balanced food. If your plant looks chewed up and worse for wear, you might have uninvited guests; identifying pest infestations early can save your blooms from becoming an all-you-can-eat buffet.
And then there are those sneaky environmental stressors – too much sun here, not enough water there can leave your hydrangea feeling out of sorts and unwilling to flower. By keeping an eye out for these signs and acting accordingly, you’ll be well on your way to solving the mystery behind your non-blooming hydrangea and getting back on track to increase Hydrangea blooms in no time!
Method 1: Pruning Correctly
Pruning isn’t just about snipping away at your hydrangeas willy-nilly. It’s a crucial step to increase Hydrangea Blooms. Get it right, and you’re on your way to a garden that’s the envy of the neighborhood.
When to Prune Hydrangeas
Timing is everything when it comes to pruning hydrangeas. Prune too early or too late, and you might as well say goodbye to those lush blooms you’ve been dreaming of. For most hydrangea species, the best season for hydrangea pruning is late winter or early spring, just before new growth starts kicking in. However, this rule has its exceptions based on the type of hydrangea you’re dealing with.
For example, Bigleaf and Oakleaf varieties should only see the shears after they’ve bloomed since they flower on old wood from the previous year. Meanwhile, Panicle and Smooth hydrangeas are less fussy and can be pruned in late winter without worry because they bloom on new wood. Knowing your hydrangea’s habits is key here; it ensures you’re not cutting off this year’s flowers before they even have a chance to show off.
The optimal pruning period for hydrangeas also depends on your climate zone. In colder areas, waiting until the last frost has passed is wise to avoid damaging new growths that are eager to emerge with the first signs of spring. This seasonal dance ensures your plants remain healthy and ready to produce those coveted blooms when conditions are just right.
How to Prune Hydrangeas for Maximum Blooms
Pruning techniques can make or break your quest for more flowers. The goal here is not just cutting back but doing so with purpose and precision. Start by removing any dead or dying branches; this encourages healthier growths that are more likely to flower.
When tackling old wood versus new growth pruning, remember: Old wood carries last year’s buds, which will turn into this season’s blooms for certain types of hydrangeas. Cutting them back too harshly means bidding farewell to potential flowers. On the flip side, varieties that bloom on new wood benefit from a good trim as it stimulates robust growth and thus more blooms.
For maximum impact, focus on thinning out crowded centers; this improves air circulation and light penetration throughout the plant—a must for healthy development and blooming. Also, when cutting back branches, aim just above a pair of healthy buds at an angle. This technique encourages branching out where each branch has the potential to end in a spectacular bloom.
Remembering these strategic moves during pruning season can significantly increase Hydrangea Blooms—transforming your garden into a vibrant showcase of color and life.
Method 2: Proper Watering Techniques
Watering your hydrangeas correctly is like hitting the jackpot for increasing hydrangea blooms. It’s all about finding that sweet spot between too much and too little water. Let’s dive into how you can master this balancing act.
How Much Water Do Hydrangeas Need?
Hydrangeas are a bit like Goldilocks; they don’t want too much or too little water, they want it just right. The amount of water your hydrangea needs can depend on several factors, including the climate you live in, the type of soil in your garden, and the size of your plant. Generally speaking, hydrangeas thrive with consistent moisture but don’t do well with wet feet.
Now, let’s talk about the signs that you’re veering off course. If you’re overwatering, you might notice yellowing leaves or a lack of flower growth. This is because roots need air as well as water to function properly, and too much water can suffocate them. On the flip side, underwatered hydrangeas will start to look sad pretty quickly. Their leaves might droop or turn brown at the edges when they’re not getting enough hydration.
Identifying these signs early on is crucial for adjusting your watering habits to ensure optimal hydration for your hydrangeas. Keeping an eye on these symptoms will help you fine-tune your hydrangea watering guide and keep those blooms coming.
Best Practices for Watering Hydrangeas
When it comes to watering hydrangeas, timing is everything. Watering in the morning gives your plants plenty of time to absorb moisture before the heat of the day evaporates it away. This method also helps prevent fungal diseases that can thrive in damp conditions overnight.
As for methods, think gentle showers over torrential downpours. Using a soaker hose around the base of your plant ensures that water gets deep into the soil where roots can easily access it without wasting water or splashing onto leaves which could invite disease.
Lastly, let’s talk frequency adjustments based on weather conditions because not every day is created equal in the garden world. During hot spells or windy days, your hydrangeas might need extra drinks to stay hydrated. Conversely, if you’ve had a week filled with rainstorms, it’s okay to skip your regular watering schedule.
By following these simple yet effective hydrangea care tips, such as morning watering benefits and using soaker hoses correctly while adjusting based on weather changes, you’ll ensure deep hydration for your plants leading to more vibrant blooms each season.
Method 3: Fertilizing Appropriately
To increase hydrangea blooms, giving your plants the right food at the right time is like hitting the jackpot. Let’s dive into how to pick the perfect snack for your hydrangeas and when to serve it up.
Choosing the Right Fertilizer for Your Hydrangea
Not all hydrangeas are hungry for the same nutrients. Like picking a restaurant, you’ve got to know what your plant craves. A soil test for hydrangeas can be a game-changer here, telling you exactly what’s missing from your soil’s menu.
Think of fertilizers as different cuisines. Some hydrangeas might be craving Italian (more acidic soil), while others want a good old American burger (balanced nutrients). The nutrient requirements vary, so understanding what your specific type of hydrangea needs is crucial.
Now, onto the buffet options: organic vs chemical fertilizers. Organic fertilizers are like home-cooked meals – they’re gentle and release nutrients slowly but surely. Chemical fertilizers, on the other hand, are like fast food – quick and potent but can be harsh if overdone.
For those who prefer a set-it-and-forget-it approach, slow-release fertilizer is your best friend. It gradually feeds your hydrangea growth, ensuring they don’t binge-eat all their nutrients at once.
When and How Often to Fertilize
Timing is everything when it comes to feeding your hydrangeas. Think of it as scheduling meals around their life stages. The fertilizing schedule for hydrangeas usually involves a springtime appetizer when they start waking up from winter.
As summer approaches and they begin showing off their leaves and buds, that’s your cue for the main course. But beware of overfeeding; signs of over-fertilization include burnt leaves or lackluster blooms – a clear no-no if you’re aiming for a garden showstopper.
And just like us switching to lighter meals in summer’s heat, ease up on fertilizing as fall rolls around. This helps your plants prepare for their winter nap without new growth that can’t withstand cold snaps.
Remembering these seasonal fertilizing tips ensures that every meal is timely and just right, keeping those blooms coming back bigger and brighter each year while maintaining healthy blooms without tipping into excess.
Method 4: Ensuring Adequate Sunlight
Let’s talk about the sun, baby! Just like us, hydrangeas love soaking up some rays, but not too much. Finding that sweet spot of optimal sunlight for hydrangeas is key to seeing those blooms explode in color.
Understanding the Light Requirements of Your Specific Type of Hydrangea
Not all hydrangeas are created equal when it comes to sunbathing. Some like it hot, while others prefer a bit of shade to keep their cool. The trick to increase hydrangea blooms? Know your hydrangea type like the back of your hand. Whether you’re dealing with a Bigleaf or a Panicle, each has its own specific hydrangea sunlight requirements.
Bigleaf varieties, for instance, can throw a fit if left under the scorching afternoon sun too long. They prefer morning light and afternoon shade. On the flip side, Panicles stand tall and proud in full sun without breaking a sweat.
Identifying your hydrangea’s species is step one. Once you’ve got that down, adjusting their spot in the garden becomes a game of match-the-plant-to-its-preferred-light-condition. It’s like setting up a friend on a blind date with the sun; you want to make sure they’ll get along just fine.
Remember, getting this right means happier plants and more vibrant blooms. So take your time to observe how sunlight moves across your garden throughout the day. This will help you nail down the perfect location where your hydrangeas can bask in just the right amount of light without feeling overwhelmed.
Tips on Positioning Your Plant for Optimal Sunlight
Now that we know our hydrangeas aren’t all about that “sun’s out, guns out” life, let’s talk placement strategy. First off, if you’re planting directly in the garden, aim for spots where morning light hits gently but gives way to shaded relief by afternoon—especially during those scorching summer months.
For potted pals, flexibility is your best friend. Pots allow you to move your plants around based on seasonal sunlight adjustments for hydrangeas. Notice your plant getting too much direct light? Scoot it over into a shadier nook as needed.
But here’s something else: As your plant grows from its awkward teenage phase into full-blown maturity, its tolerance to sunlight might change too. Younger plants often need protection from harsh rays until they’re strong enough to handle more exposure.
And don’t forget about winter! While it might seem counterintuitive, some hydrangeas actually appreciate a bit more sunshine during colder months when light intensity isn’t as fierce.
In essence, think of positioning your hydrangeas as an ongoing dialogue with Mother Nature herself—checking in seasonally ensures they always have just what they need to thrive and bloom spectacularly.
Method 5: Soil Quality and pH Levels
To increase hydrangea blooms, focusing on the nitty-gritty of soil quality and pH levels can be a game-changer. Let’s dive into how these factors play a pivotal role in your hydrangea’s performance.
Importance of Soil Quality in Bloom Production
Imagine trying to build a house on quicksand. Not ideal, right? Similarly, expecting bountiful hydrangea blooms from poor soil is a gardening faux pas. High-quality soil acts like a cozy bed for your plants, providing them with all the nutrients they need to flourish and put on a show with vibrant flowers.
Nutrient-rich soil for hydrangeas isn’t just about feeding them; it’s about creating an environment where water and air flow freely, ensuring roots are well-aerated and not drowning or gasping for air. Enhancing garden drainage can prevent waterlogging, which is akin to giving your plants’ roots a breathable raincoat during wet seasons.
Incorporating organic matter benefits in gardening by breaking up dense earth, making room for roots to spread out comfortably and soak up all the goodness you’re offering. Think of it as upgrading your garden’s diet from fast food to gourmet meals. Improving flower bed soil with compost or aged manure is like hitting the jackpot in the plant world – it introduces beneficial microbes that help break down nutrients into forms more easily absorbed by plant roots.
Adjusting Soil pH for Healthier Plants
Now, let’s talk about getting that soil pH just right. Hydrangeas are picky eaters when it comes to pH levels; too high or too low can turn your bloom bonanza into a fizzle. Testing garden soil pH is step one – think of it as diagnosing before prescribing treatment.
If you find your garden leaning towards alkaline territory (pH above 7), adding sulfur can help lower those numbers, making the environment more acidic – just how hydrangeas like it. On the flip side, if you’re dealing with acidic soil (pH below 6), sprinkling some lime can sweeten things up by raising the pH level.
Maintaining ideal pH for hydrangeas doesn’t stop after one adjustment; it’s an ongoing relationship. Regularly testing and tweaking ensures your soil remains in that sweet spot where hydrangeas thrive best. Remember, acidifying soil for hydrangeas isn’t about drastic changes overnight but gradual adjustments that keep your plants happy and healthy over time.
Alkaline vs acidic soil adjustments require patience and precision – too much lime or sulfur can swing things too far in either direction, causing more harm than good. Think of it as seasoning food: It’s easier to add more salt later than to fix an overly salty dish.
By focusing on improving garden soil quality through nutrient enrichment, proper drainage, and maintaining optimal pH levels with thoughtful amendments like lime or sulfur, you’re setting the stage for increasing hydrangea blooms significantly.
Method 6: Pest Control and Disease Prevention
To increase hydrangea blooms, keeping those pesky pests and diseases at bay is crucial. It’s like being a plant doctor, but instead of patients, you have flowers.
Common Pests and Diseases Affecting Hydrangeas
Hydrangeas, with their lush foliage and vibrant blooms, are like magnets for garden party crashers such as aphids, spider mites, and the dreaded powdery mildew. Let’s not forget about rust disease and botrytis blight, which sound more like medieval curses than plant problems. These uninvited guests suck the life out of your plants, quite literally in the case of aphids on hydrangeas and spider mites on plants. They’re tiny but mighty foes that feast on your hydrangea’s sap, weakening it over time.
Then there’s powdery mildew in hydrangeas, a fungal foe that cloaks leaves in a ghostly white film. It might look somewhat magical if it weren’t so harmful to your plant. Rust disease isn’t any better; it spots leaves with orange or brownish marks as if they’re rusting before your eyes. And botrytis blight? It’s the ultimate party pooper, causing flowers to rot and die prematurely.
These issues can turn your garden dream into a nightmare by reducing the plant’s vigor and its ability to produce those coveted blooms. Early detection is key—keep an eye out for these troublemakers so you can act fast.
Preventive Measures and Treatments
So how do you protect your hydrangeas from these botanical burglars? First off, cleanliness is next to godliness in the garden too. Remove any fallen debris around your plants to prevent fungi from throwing a rave.
Improving soil drainage ensures water doesn’t pool around roots, creating a breeding ground for diseases. Think of it as giving your plants comfy well-drained beds instead of soggy ones no one likes sleeping in wet sheets.
Mulching does wonders by retaining moisture (the good kind) and keeping weeds at bay—less competition means happier hydrangeas. But here’s a pro tip: don’t let mulch touch plant stems directly; it’s like inviting termites into wood—it just doesn’t end well.
For those stubborn pests making themselves at home on your hydrangeas, using neem oil on flowers can be a game-changer. It’s like sending pests an eviction notice without harming your plants or beneficial insects—a win-win! And when fungal foes show up uninvited? A good fungicide for garden plants can help kick them to the curb.
Don’t forget about organic pest control methods; they’re like having a security system for your garden without the harmful chemicals—it keeps pests out while keeping your conscience clear.
By staying vigilant with these preventive measures and treatments, you’re not just protecting your hydrangeas from harm; you’re setting the stage for them to thrive and bloom spectacularly.
Step-by-Step: Increasing Your Hydrangea’s Bloom Production
So, you want your hydrangeas to be the envy of the neighborhood, bursting with blooms that make passersby stop and stare? You’re in luck! Getting those blooms to multiply isn’t rocket science, but it does require a bit of know-how and elbow grease. Let’s roll up our sleeves and dive into the steps that will transform your hydrangeas from blah to breathtaking.
-
Choose the Right Location: Like a cat finding its perfect sunbathing spot, hydrangeas thrive when they’re in the right place. They love morning sun and afternoon shade. Too much sun can scorch them, while too little can stunt their bloom production. Find a spot that gets just the right amount of light, and you’re on your way.
-
Test Your Soil: Hydrangeas are picky eaters; they prefer their soil just so. Use a soil test kit from your local garden center to check the pH level. Aim for a pH between 6 and 7 for most varieties. If your soil is too acidic or alkaline, amend it with lime (to raise pH) or sulfur (to lower pH).
-
Water Wisely: These plants love water, but there’s a fine line between hydrated and drowned. Water them deeply once or twice a week rather than a little every day. This encourages deep root growth which is essential for healthy plants and abundant blooms.
-
Feed Them Right: Think of fertilizer like vitamins for your plants. In early spring, feed your hydrangeas with a slow-release fertilizer designed specifically for them or an all-purpose 10-10-10 formula. A well-fed plant is a happy bloomer.
-
Prune Properly: Pruning scares many gardeners but think of it as giving your plant a haircut—it promotes healthy growth! The key is knowing when to prune since it depends on the type of hydrangea you have. For most types, prune right after blooming ends to encourage next year’s buds.
-
Mulch Matters: Mulch isn’t just decorative; it helps retain moisture in the soil, keeps weeds at bay, and protects roots during temperature extremes. Apply 2-3 inches of organic mulch around the base of your plants each spring.
-
Watch for Pests: Keep an eye out for common pests like aphids and spider mites which can stress your plants and affect bloom production. If you spot troublemakers, use insecticidal soap or neem oil as safe remedies.
By following these steps diligently, you’ll set the stage for your hydrangeas to produce more blooms than ever before—making every glance at them a mini-celebration of color and beauty!
Additional Tips to Boost Flower Production
Now that we’ve covered the main methods to get those hydrangeas bursting with blooms, let’s not put our gardening gloves away just yet. There are a few more tricks up our sleeves to really push the envelope and get even more fabulous flowers out of these beauties. Think of these as the secret sauce, the cherry on top, or the hidden cheat codes that can make a good hydrangea garden turn into an extraordinary one.
-
Water wisely: Hydrangeas love water, but too much or too little can be a party pooper for their blooms. Aim for just right; think Goldilocks. A deep watering once or twice a week is better than a little sprinkle every day.
-
Mulch magic: Keep those roots cozy and moist by adding a layer of mulch around your plants. Not only does it help retain moisture, but it also keeps the soil temperature stable and adds nutrients as it breaks down.
-
Prune with purpose: Not all hydrangeas need pruning at the same time or in the same way. Knowing when and how to prune your specific type can make a big difference in next year’s bloom bounty.
-
Feed them well: Use a slow-release fertilizer designed for flowering plants in early spring. Just like us after a long nap, your hydrangeas will wake up hungry and ready to grow.
-
Sunlight savvy: Too much sun can lead to sunburnt leaves, while too little can result in few blooms. Find that sweet spot where your hydrangeas get enough light without getting scorched.
-
Pest patrol: Keep an eye out for pesky bugs or diseases that could hinder growth. Healthy plants are happy bloomers, so don’t let invaders ruin the party.

To Wrap Up
We’ve explored the world of hydrangeas and learned how to Increase Hydrangea Blooms. From proper watering, soil pH adjustments, pruning methods, fertilization, to the use of coffee grounds and eggshells.
Remember that patience is key. It may take a season or two for your hydrangeas to bloom more abundantly. But with these tips in hand, you’re well on your way to creating a stunning display of blooms.
So go ahead, grab those gardening gloves and let’s make those hydrangeas flourish!