Did you know that the lavender plant, renowned for its captivating fragrance and stunning purple blooms, is one of the most difficult plants to transplant successfully? The key lies in understanding How to Transplant Lavender Successfully.
Lavender’s delicate root system and susceptibility to transplant shock can make this process a daunting task even for experienced gardeners. But fear not! With the right knowledge and techniques, you too can master this art.
So, if you’ve been wondering how to give your lavender a new home without causing it undue stress, keep reading. We’re about to unravel the secrets behind successful lavender transplantation.
Quick Answer
- Transplanting Lavender can be tricky due to its sensitive root system. Avoid transplant shock by understanding the signs and acting promptly.
- The best time to transplant lavender is in the spring or early fall, with cool, overcast weather being ideal.
- Prepare for transplantation by selecting a sunny location with well-draining soil. Amend the soil if necessary.
- Follow a step-by-step guide to transplant lavender successfully, ensuring you handle roots gently and plant at the correct depth.
- Post-transplant care involves regular watering, but avoid overwatering. Use mulch and fertilizer as needed.
- Avoid common mistakes like planting too deep or in poorly draining soil. Monitor your transplanted lavender for success.

Why is Transplanting Lavender Challenging?
Transplanting lavender can be tricky due to its lavender root system and sensitivity, leading to lavender transplant shock if not done carefully.
Understanding Lavender’s Root System
Lavender has a unique root structure that makes it a bit of a diva when moving it from one spot to another. Imagine trying to move a sleeping cat without waking it up. That’s how delicate you need to be with lavender’s roots. These roots are like the plant’s lifeline, sucking up water and nutrients from the soil. If they get damaged, your lavender might throw a fit.
The roots of lavender plants spread out wide but not very deep. This means they can easily get stressed out if they don’t have enough room or if they’re handled too roughly. It’s like trying to wear shoes that are too tight; nobody likes that! When transplanting, being gentle is key because those roots are working hard down there, even if we can’t see them.
Understanding plant roots helps us get why some plants hate moving day. For lavender, their root care is top priority because happy roots mean a happy plant. Think of transplanting and root systems as a puzzle; everything needs to fit just right for the picture to come together perfectly.
Identifying Signs of Transplant Shock in Lavender
When lavender gets upset after moving, it shows signs of transplant shock. The first clue? Its leaves might turn yellow or drop off like it’s giving up on life. But don’t panic yet! This is just its dramatic way of saying, “I’m stressed!”
Another sign your lavender is throwing a tantrum is wilting leaves, even when the soil is wet. It’s like when you’re thirsty but don’t feel like drinking water. The plant is struggling to take up water because its roots got shaken up during the move.
Identifying plant stress early can save your lavender from turning into a sad, brown mess. If your plant looks droopy or its growth slows down after transplantation, it’s yelling for help in plant language.
Symptoms of unhealthy lavender plants aren’t always a death sentence. With some TLC and patience, most lavenders bounce back once they adjust to their new home. Diagnosing lavender problems after transplantation means playing detective but remember: most issues stem from those all-important roots getting disturbed.
When is the Best Time to Transplant Lavender?
Picking the right moment is crucial when moving your lavender plant. Aim for a sweet spot when the weather is just right.
Seasonal Considerations for Transplanting
When it comes to giving your lavender a new home, not all seasons are created equal. Spring and fall pop up as champions for this task. Why? Well, these seasons offer what lavender loves most: cool but not freezing nights and mild days. Let’s dive deeper.
Spring shines as a prime time because it gives lavender a chance to settle in before summer’s heat waves hit. The plant gets enough time to establish its roots, making it stronger and ready for hotter days.
Fall, on the other hand, has its perks too. It’s like giving your plant a head start. Post-summer, when the soil is still warm but the scorching sun isn’t directly overhead, lavender can focus on root growth without stressing over flower production.
However, timing within these seasons matters too. Early spring or late fall? That’s your golden window. You want to catch that moment when temperatures are consistently mild—neither too cold nor too hot.
The Ideal Weather Conditions for Transplanting Lavender
Now let’s talk about what kind of weather makes lavender happiest during moving day. Ideal conditions don’t just happen; they’re chosen with care.
First off, temperature plays a big role. Lavender thrives in temps ranging from 50°F to 80°F (10°C to 27°C). This range keeps the plant comfy—not sweating under intense heat or shivering in cold snaps.
Moisture levels come next in line of importance. Lavender doesn’t like wet feet! Aim for well-drained soil and avoid rainy days for transplanting. A dry or slightly moist day is perfect, allowing the roots to gradually adapt without water stress.
Lastly, consider cloud cover. A partly cloudy day is ideal because it shields lavender from harsh sunlight while still providing enough light and warmth for acclimatization.
Preparing to Transplant Lavender
Getting your lavender from one spot to another without a hitch starts with some smart prep work. Think of it like moving house for your plant – you wouldn’t just shove your stuff in boxes without sorting first, right?
Selecting the Right Location
Picking the perfect spot for your lavender is like choosing the best sunny room for your favorite chair. Lavenders love the sun, so find a place that gets at least six hours of direct sunlight every day. This is non-negotiable; these plants are sun worshippers!
Now, let’s talk about drainage. Lavender hates wet feet, so pick a spot where water doesn’t hang around after rain. If you’re not sure, do a quick test by digging a hole and filling it with water. If it drains within an hour or so, you’re golden.
Space is another biggie. These plants need room to spread out and breathe. Keep them at least 2 to 3 feet apart because crowded lavenders are unhappy lavenders. It’s all about giving them their personal space to flourish.
Soil Preparation and Requirements
Soil prep is like making a comfy bed for your lavender. Start by checking the pH level; lavender thrives in soil that’s slightly alkaline, around 6.5 to 7.5 on the pH scale. You can easily test this with a kit from your local garden center.
Next up: drainage! Mix in some sand or gravel if your soil is more clingy than free-draining. Lavender roots despise being waterlogged.
Nutrients are important but don’t overdo it. A little compost mixed into the planting hole does wonders without overwhelming your plant with too much of a good thing.
Remember, preparing the soil isn’t just digging and dumping; it’s about creating the ideal home base where your lavender can settle in without stress.
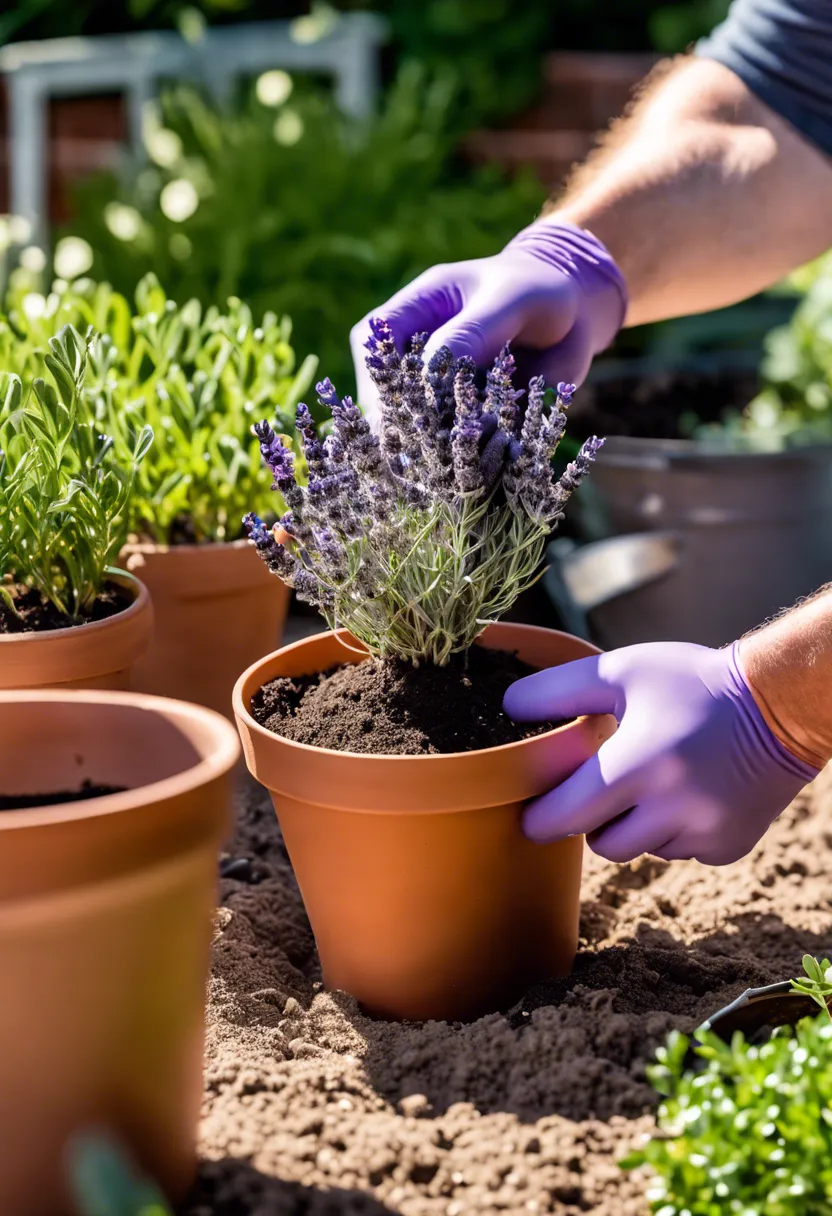
How to Transplant Lavender Successfully?
Transplanting lavender doesn’t have to be a headache. With the right steps, you can move your lovely lavender plants to their new home without causing them too much stress. Let’s walk through how to do this smoothly and keep your lavender happy.
-
Choose the right time: Timing is everything! The best times to transplant lavender are in the spring or early fall. This gives your plant a chance to settle in before either the hot summer or cold winter.
-
Water your plant: A day before moving day, give your lavender a good drink. This helps ensure it’s hydrated, making it more resilient during the transplant.
-
Prepare the new site: Lavender loves the sun and well-draining soil. Pick a sunny spot and if your soil is heavy or clay-like, mix in some sand or gravel to improve drainage.
-
Dig carefully: Use a garden fork or shovel to dig around your lavender plant, giving plenty of room so you don’t cut into the roots. Aim for a root ball size that supports the plant but is manageable to move.
-
Lift with care: Once you’ve loosened the soil around it, gently lift your lavender plant from its current location, keeping as much soil around the roots as possible.
-
Move quickly: Lavender doesn’t like its roots exposed for too long, so transport it immediately to its new location once lifted.
-
Plant at the same depth: When planting your lavender in its new spot, make sure it sits at the same depth in the soil as it did before. This helps prevent shock and encourages healthy growth.
-
Water thoroughly: After transplanting, water your lavender deeply to help settle any air pockets and provide moisture for those stressed roots.
-
Mulch lightly: Add a light layer of mulch around the base of your transplanted lavender to retain moisture and discourage weeds without suffocating your plant.
-
Monitor and care: Keep an eye on your transplanted lavender over the next few weeks, watering when needed but not overdoing it (lavender prefers things on the drier side). Watch for signs of recovery like new growth which indicates successful transplantation!
Following these steps will help ensure that your lavender adjusts smoothly to its new location with minimal stress and continues thriving for seasons to come.
Caring for Lavender Post-Transplant
After you’ve moved your lavender, it’s crucial to give it the right TLC. This means lavender post-transplant care is all about watering and feeding it just right.
Watering Techniques and Schedule
Watering your transplanted lavender isn’t rocket science, but there’s a trick to doing it well. Right after moving your plant, give it a good soak. This helps the soil settle and gets rid of air pockets that can dry out roots. Then, ease up on the water. Lavender doesn’t like wet feet. Aim to keep the soil slightly moist but never soggy.
Stick to a schedule that allows the top inch of soil to dry out before watering again. In hot weather, this might mean watering every other day. When it cools down, once or twice a week could be enough. The key is observing your plant and the soil.
Using a gentle stream of water directly at the base keeps the leaves dry and prevents fungal diseases. Early morning is the best time for watering. It gives plants time to absorb moisture before the heat of the day.
Mulching and Fertilization Strategies
Mulch is like a cozy blanket for your transplanted lavenders. It keeps moisture in, weeds out, and regulates soil temperature. Spread a 2-inch layer of organic mulch around your lavender, keeping it away from the stem to prevent rot.
Fertilizing isn’t really lavender’s thing; they’re pretty low-maintenance. However, a light application of compost or slow-release fertilizer in spring can encourage growth without overwhelming your plant.
Remember not to overdo it with fertilizer – more isn’t better here! Lavender thrives in not-so-rich soil, so keeping things lean encourages better blooms and stronger fragrance.
Combining these mulching and fertilization strategies sets up your lavender for success after transplanting. It’s all about creating an environment where your plant can thrive with minimal fuss.
Common Mistakes to Avoid During Lavender Transplantation
Transplanting lavender might seem like a walk in the park, but even the greenest of thumbs can stumble. To keep your lavender happy and thriving, sidestepping these common blunders is key. Let’s dive into what not to do, so you can keep your garden looking and smelling amazing.
-
Forgetting to check the weather forecast: Lavender loves the sun and doesn’t appreciate being moved during a rainstorm. Planting on a cloudy day with no rain in sight gives it time to adjust without stress.
-
Ignoring soil conditions: Lavender thrives in well-drained soil with a neutral to slightly alkaline pH. Skipping the step of amending your soil or checking its pH can lead to unhappy plants that won’t bloom as beautifully.
-
Watering too much or too little: While it’s important to keep the soil moist immediately after transplanting, overwatering can drown your lavender’s roots. On the flip side, letting it go bone dry can stress it out. Aim for a happy medium.
-
Planting at the wrong depth: Burying lavender too deep or not deep enough can spell trouble. The top of the root ball should be level with the surrounding soil to ensure proper growth.
-
Overcrowding plants: Lavender needs space to spread out and breathe. Planting them too close together limits air circulation and sunlight, leading to weak plants that are more susceptible to disease.
-
Neglecting post-transplant care: Just because your lavender is in the ground doesn’t mean it’s time to ignore it. Failing to provide adequate water (without overdoing it) and not mulching can leave your plant struggling to adapt.
-
Skipping acclimatization: Moving your plant straight from a shaded area into full sun without giving it time to adjust is a recipe for shock. Gradually introduce it to more light each day over a week or so before transplanting.
Remember, avoiding these mistakes isn’t just about keeping your plants alive; it’s about helping them thrive. With these tips in mind, you’re well on your way to becoming a lavender transplanting pro!
Monitoring Your Transplanted Lavender for Success
| Week After Transplant | What to Monitor | Expected Condition | Action if Deviation |
|---|---|---|---|
| 1 | Soil Moisture | Should be moist | Water the plant |
| 2 | Leaf Color | Green | Apply fertilizer |
| 3 | Stem Strength | Firm | Stake the plant |
| 4 | Bud Formation | Buds appearing | No action required |
| 5 | Flowering | Flowers blooming | No action required |
| 6 | Fragrance | Strong scent | No action required |
| Every week | Pest Presence | No pests | Use organic pesticide |
To Wrap Up
So, we’ve learned a lot about How to Transplant Lavender Successfully. It’s not just pulling it out and sticking it somewhere else. Timing is key – best in the spring or fall. And remember, don’t forget about that root ball!
Also, your lavender plant needs some TLC after the move. Water it well and give it some shade for a while. No need to rush things.
Finally, keep an eye on your transplanted lavender. If you see signs of stress, act quickly! With these tips, you’re ready to be a lavender transplant pro!

FAQs about ‘How to Transplant Lavender Successfully (Avoid Transplant Shock)’.
What types of lavender are best for transplanting?
Some types of lavender, such as English and French varieties, tend to handle transplanting better than others due to their hardiness and adaptability.
How do I know if my transplanted lavender is experiencing shock?
Signs of transplant shock include wilting, yellowing leaves, and slow growth. If you notice these symptoms, it may be necessary to adjust your care routine.
Can I transplant lavender in the winter?
While it’s possible to transplant lavender in the winter, it’s not ideal. The plant prefers warm weather and well-drained soil conditions that are typically not present during colder months.
How often should I water my transplanted lavender?
Watering frequency depends on your climate and soil type. Generally, newly transplanted lavenders need more frequent watering until they establish their root system.
Can I use fertilizer immediately after transplanting lavender?
It’s usually recommended to wait a few weeks before applying fertilizer to give the plant time to adjust. Using a gentle organic fertilizer can help promote healthy growth without overwhelming the plant.
What should I do if my transplanted lavender isn’t thriving?
If your transplanted lavender isn’t doing well despite following all guidelines, consider consulting with a local horticulturist or extension service. They can provide advice tailored specifically to your region and situation.
Do all varieties of Lavender require the same post-transplant care?
While basic care principles apply across most varieties of Lavender, specific needs may vary depending on the variety. Always research the specific needs of your chosen variety for best results.