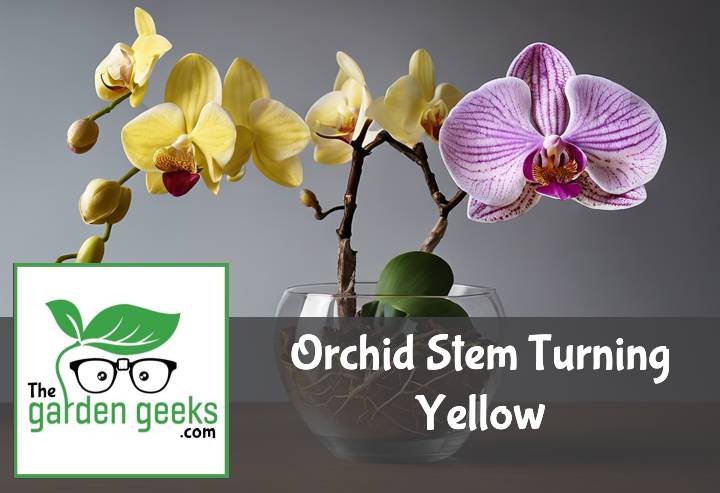
Responsive Menu

Orchid Stem Turning Yellow? (3 Reasons)

By:

Published:

Updated:

Have you noticed your Orchid Stem Turning Yellow? Don’t panic just yet! It’s a common issue among orchid enthusiasts, and it could be due to a variety of reasons.

Whether you’re an experienced horticulturist or a beginner in the realm of orchid care, understanding why this phenomenon occurs is essential. It’s not always a death sentence for your beloved plant; sometimes, it’s just a cry for help.

So, buckle up as we delve into the world of yellowing orchid stems and uncover the possible causes behind this disheartening sight. Keep reading about Orchid Stem Turning Yellow to learn more about how to keep your plant healthy and vibrant.

Key Takeaways

  • Your orchid’s stem is turning yellow because it’s either overwatered, underlit, or infected.
  • Overwatering is like drowning your plant in love; it suffocates the roots and turns the stem yellow. So, chill with the watering can!
  • Not enough light makes your orchid feel gloomy and its stem turn yellow. It needs a sunny spot but not direct sunlight – think beach vacation, not desert trek.
  • Lastly, infections are like plant flu that can cause yellow stems. If other treatments fail, consider a plant doctor (aka fungicide).

Understanding Orchid Health

When it comes to orchid care tips, knowing the difference between healthy and unhealthy stems is crucial. This knowledge is foundational for effective orchid maintenance and diagnosing issues early on.

Recognizing Healthy Orchid Stems

A vibrant orchid is a sight to behold, and its stem tells a lot about its health. Healthy orchid stems are your green light—literally. They should boast a bright green color, signaling all is well in orchid paradise. These stems feel firm to the touch, standing strong and supporting blooms with confidence.

See also
Why is My Lavender Dying? (8 Solutions That Actually Work)

But it’s not just about being green and sturdy; healthy stems show normal orchid growth patterns. They grow upwards or outwards, depending on the orchid type, without any kinks or bends. This growth pattern ensures your orchids have the best shot at producing those stunning flowers we all love.

Moreover, a healthy stem contributes to the overall appearance of vibrant orchids. It’s like the plant’s backbone, keeping everything upright and in order. When you see an orchid with a green, firm stem that follows a natural growth direction, you know you’re looking at a well-cared-for plant.

Identifying Unhealthy Orchid Stems

Now let’s talk about when things go south. An orchid stem turning yellow is your first red flag—well, yellow flag. This discoloration signals that not everything is right in your orchid’s world. Yellowing can be due to various factors, from water issues to disease.

Soft spots on stems are another telltale sign of trouble. These areas might feel mushy or look darker than the rest of the stem—a clear indicator of potential stem rot in orchids. If left unchecked, this can lead to serious health issues for your plant.

Recognizing these signs early can make all the difference in preventing orchid diseases. The sooner you spot yellowing orchid stems or soft spots, the quicker you can take action to treat your unhealthy orchids and get them back on track toward health.

Reason 1: Overwatering

Overwatering is a common misstep in orchid care that can lead to a host of problems, including the dreaded Orchid Stem Turning Yellow. It’s crucial to understand how too much water affects these delicate plants and what you can do to prevent it.

How Overwatering Affects Orchids

When you love your orchids a bit too much and drench them in water, you’re actually drowning their roots. Orchids are like the Goldilocks of the plant world; they need everything just right. Too much water, and you’ll find yourself dealing with root rot in orchids, a condition as nasty as it sounds. This happens because orchid roots need air as well as water to stay healthy. Submerge them in water for too long, and they’ll suffocate, leading to poor orchid health.

See also
Why is My Lavender Plant Wilting? (How to Solve it)

But wait, there’s more! Overwatering doesn’t just stop at root rot. It invites a whole party of issues, including fungal diseases that thrive in moist conditions. These unwelcome guests can cause extensive excessive water damage, turning your once-thriving orchid into a sad, yellow mess. That’s why mastering an orchid watering guide is not just helpful; it’s essential for keeping those beauties blooming.

Signs of Overwatered Orchids

So how do you know if you’ve been overzealous with the watering can? First off, keep an eye out for yellow leaves—a classic SOS signal from your orchid. But don’t stop there; feel the roots. If they’re mushy or softer than your favorite plush toy, that’s a red flag.

Another tell-tale sign is a waterlogged potting medium. If it feels more like a swamp than soil, it’s time to cut back on the H2O. And let’s not forget about potential fungal infections—these baddies love wet conditions and will happily set up camp in your overwatered orchid.

Catching these symptoms early is key to saving overwatered orchid plants from meeting an untimely end. Adjust your watering habits pronto and give your plant some TLC to nurse it back to health. Remember, when it comes to watering orchids, less is often more!

Reason 2: Nutrient Deficiency

Orchid with yellow stem due to overwatering, surrounded by water droplets, near a half-filled watering can.

When your orchid stem turning yellow, it might be crying out for help due to nutrient deficiency. Just like humans need a balanced diet, orchids require a cocktail of nutrients to flourish.

Importance of Nutrients for Orchids

Nutrients are the building blocks of life for orchids, playing a pivotal role in every aspect of their existence. From the lush green leaves that capture sunlight to the vibrant blooms that dazzle onlookers, every part of an orchid’s life cycle hinges on proper nutrition. Without these essential nutrients, orchids can’t perform photosynthesis effectively, stunting their growth and dimming their once bright flowers.

See also
How to Revive a Dying Money Tree

A lack of nutrients doesn’t just affect an orchid’s current state; it jeopardizes its future. Insufficient nourishment can lead to weak root systems, making it difficult for plants to absorb water and further nutrients. This creates a vicious cycle where the plant becomes increasingly vulnerable. For blooming enthusiasts, nutrient deficiencies can mean fewer flowers or even seasons passing without a single bloom. It’s clear that for robust growth and regular blooming frequency, keeping an eye on nutrient levels is non-negotiable in orchid care.

Indications of Nutrient Deficiency in Orchids

Spotting a nutrient deficiency early can save you a lot of trouble down the line. One tell-tale sign is leaf discoloration; if your orchid’s leaves are turning yellow or developing dark spots, it’s time to reassess its diet. But don’t stop at color changes—texture speaks volumes too. Leaves may become limp or leathery when they’re not getting enough food.

Growth patterns also offer clues about your plant’s health. A stunted growth or unusually small leaves suggest your orchid is struggling to find the energy for development. Similarly, if new shoots appear weak or fail to mature properly, it could indicate a serious shortfall in essential nutrients.

Understanding these signs is crucial in diagnosing and rectifying issues with your plant’s nutrition before they escalate into more severe problems like yellowing orchid stems or total plant failure. By keeping an eye out for these symptoms and responding promptly with appropriate fertilizing orchids practices, you can ensure your plants remain vibrant and healthy.

Reason 3: Disease or Pest Infestation

When your orchid stem turning yellow feels like a mystery, it might just be the work of unseen culprits. Yes, we’re talking about diseases and pest infestations that sneak up on your beloved orchids.

Common Diseases and Pests Affecting Orchids

Orchids are like the divas of the plant world; they demand attention and care. But sometimes, despite our best efforts, they fall victim to diseases and pests that can turn those lush green stems into a worrisome yellow. Fungal infections in orchids are a common headache for orchid enthusiasts. These sneaky invaders can lead to root rot symptoms, which if not caught early, spell disaster for your plant.

See also
How to Revive a Dying Succulent Plant

Then there’s bacterial rot in orchids, another silent stem-yellowing assassin. It creeps in, making the stems mushy and discolored, a sight no plant lover wants to see. And let’s not forget about the pests – orchid mite infestation and aphids on orchids are like uninvited guests at a party, sucking the life out of your plants and leaving behind yellowed stems as evidence of their feast.

Preventing these issues involves keeping an eye out for early signs and maintaining good orchid pest control practices. It’s all about creating an environment where your orchids can thrive without unwelcome intruders.

Symptoms of Diseased or Pest-Infested Orchids

Spotting diseased orchids early can make all the difference between saving your plant or saying goodbye. One tell-tale sign is when you see parts of the orchid that should be green turning yellow – yes, especially those stems. But how do you know if pests or diseases are to blame?

Look out for leaf discoloration in orchids; it’s not just about yellowing but also spots or patches that seem out of place. Then there’s the texture; healthy orchid leaves are firm and plump, so if yours feel soft or squishy, alarm bells should ring.

Identifying orchid root rot involves a bit more detective work since roots are usually hidden away in pots. However, if you notice a foul smell coming from the potting medium or if the roots visible through transparent pots look brown and mushy instead of white and firm, you’ve got trouble.

Early detection of plant pests is crucial too. Tiny moving dots on leaves or stems? Webbing under leaves or along stem joints? These are signs you’ve got uninvited guests feasting on your orchid.

Understanding these symptoms is key in treating orchid stem yellowing effectively because each problem requires its own specific solution – from changing watering habits to applying targeted treatments for pests or diseases.

See also
How to Revive A Dying Croton Plant
Symptom Possible Cause Suggested Immediate Action
Yellowing of Leaves Overwatering, Nutrient Deficiency Reduce watering frequency; Check for proper drainage; Consider a balanced fertilizer application
Soft, Mushy Stem or Roots Overwatering Stop watering until top inch of soil is dry; Ensure good drainage; Possibly repot in fresh, well-draining medium
Dark Spots on Leaves or Stems Disease/Pest Infestation Isolate the plant; Apply appropriate fungicide or pesticide; Remove affected areas
Leaf Drop Overwatering, Nutrient Deficiency Adjust watering schedule; Ensure adequate light and nutrients
Wrinkled or Shriveled Leaves Underwatering, Nutrient Deficiency Increase watering frequency cautiously; Apply a balanced fertilizer
Stunted Growth Nutrient Deficiency, Disease/Pest Infestation Apply appropriate fertilizer; Inspect for pests and treat accordingly
Discolored Patches on Flowers Disease/Pest Infestation Remove affected flowers; Treat with suitable fungicide or pesticide
Root Rot Overwatering Repot into fresh medium with proper drainage; Cut away rotted roots before repotting
Pale Leaves Nutrient Deficiency Supplement with a balanced orchid-appropriate fertilizer
Black Mold on Leaves or Stems Pest Infestation (Honeydew secretion) Clean off mold with mild soap solution; Treat plants for pests causing honeydew

Step-by-Step: Reviving a Yellowing Orchid Stem

When your orchid stem starts to look more like a banana than a vibrant plant part, it’s time to spring into action. But don’t worry, transforming your yellowing orchid stem back to its former green glory isn’t as daunting as it sounds. Let’s break down the rescue mission into manageable steps, ensuring you feel more like an orchid superhero and less like a concerned plant parent on the verge of panic.

  1. Assess the situation: Before you do anything, take a good look at your orchid. Is it just the stem that’s turning yellow, or are there other signs of distress? Yellow leaves or a lack of blooms can also indicate underlying issues. Understanding the full scope of the problem is crucial for effective intervention.

  2. Check the roots: Gently remove your orchid from its pot to inspect the root system. Healthy roots are firm and green or white, while unhealthy ones are mushy and brown or black. If you find any that are in bad shape, it’s time for some surgery! Use sterilized scissors to snip away any dead or decaying roots.

  3. Refresh the potting medium: After dealing with any root issues, give your orchid fresh potting mix to thrive in. Orchids prefer airy, well-draining mediums like bark or sphagnum moss. This step ensures that your plant has the best possible environment for recovery.

  4. Hydrate wisely: Overwatering can lead to root rot, which might be why your stem turned yellow in the first place. On the flip side, underwatering can stress out your plant. Aim for a Goldilocks watering routine—just right! Water your orchid when the top inch of soil feels dry but before it becomes completely parched.

  5. Position for success: Place your orchid in an area where it can receive bright, indirect sunlight. Too much direct sun can scorch its leaves and stems, while too little light can weaken it further.

  6. Feed gently: Once your orchid seems stable (no further yellowing), introduce a balanced fertilizer designed for orchids but at half strength to avoid overwhelming it.

  7. Monitor and adjust: Keep an eye on your revived friend over the next few weeks and months. Adjust care as needed based on how it responds to its new conditions.

See also
How to Fix a Peace Lily with Brown Leaf Tips

By following these steps with care and patience, you’ll not only stop the yellowing in its tracks but also set up your orchid for a healthier future filled with lush leaves and stunning blooms!

Preventive Measures to Keep Your Orchid Healthy

Keeping your orchid looking like it just won the plant pageant isn’t rocket science, but it does require a bit of know-how and tender loving care. Let’s dive into some simple yet effective strategies to prevent your orchid’s stem from turning yellow, ensuring it stays as vibrant and healthy as the day you brought it home.

  • Check the lighting
    Orchids are like Goldilocks; they don’t want too much or too little light. Find a spot that’s just right, with bright, indirect sunlight. Think of a spot near a window but out of direct sunbeams that can scorch their delicate leaves.

  • Mind the water
    Overwatering is the fast track to unhappy orchid roots and yellow stems. Water your orchid only when the top inch of soil feels dry. Imagine giving your plant a sip, not a swim!

  • Ensure proper drainage
    Orchids hate wet feet! Make sure their pots have good drainage holes and that you’re not letting them sit in water-filled saucers. It’s like making sure your shoes don’t leak; nobody likes soggy socks.

  • Maintain humidity levels
    These tropical beauties crave humidity. Aim for about 40-70% humidity around your plant. You can achieve this by placing a humidifier nearby or setting up a pebble tray with water beneath the pot—think of it as creating a mini spa for your orchid.

  • Fertilize wisely
    Feeding your orchid too much or too little can lead to nutrient imbalances and stress out the plant. Use an orchid-specific fertilizer and follow the instructions on the label for how often to feed. It’s like cooking pasta; following the recipe usually yields better results.

  • Regular inspections
    Keep an eye out for signs of pests or disease, such as unusual spots on leaves or tiny bugs under leaves and near stems. Early detection means you can act fast before things get worse—think of it as checking your plants for boo-boos.

  • Prune dead or unhealthy parts
    Snip off any dead flowers, leaves, or stems using sterilized scissors or pruning shears. This helps prevent disease spread and encourages healthy growth—kinda like cutting split ends makes your hair healthier.

See also
Monstera Leaves Curling? (Revive Monstera with Curling Leaves)

To Wrap Up

So, your orchid stem turning yellow had you in a tizzy? No worries! As we’ve learned, it’s usually down to three main culprits: overwatering, lack of sunlight, or natural aging.

Remember the golden rule – less is more when it comes to watering. And hey, don’t forget to give your green buddy some good old sunshine. But if it’s just getting on in years… well, even orchids can’t escape Father Time.

In the end, understanding why your Orchid Stem Turning Yellow is crucial for its care. Now go forth and use this knowledge to keep your floral friend vibrant and healthy!