Did you know that nearly 85% of all plants in our gardens are not native to North America? These exotic beauties add a splash of color and diversity, but they can also be more susceptible to local weather extremes and pests. Reviving Outdoor Plants can often feel like a daunting task, especially if you’re new to the world of gardening.
But fear not, fellow plant lovers! With the right knowledge and tools, you too can breathe life back into your wilted roses or droopy daisies. It’s all about understanding what your plants need and responding in time.
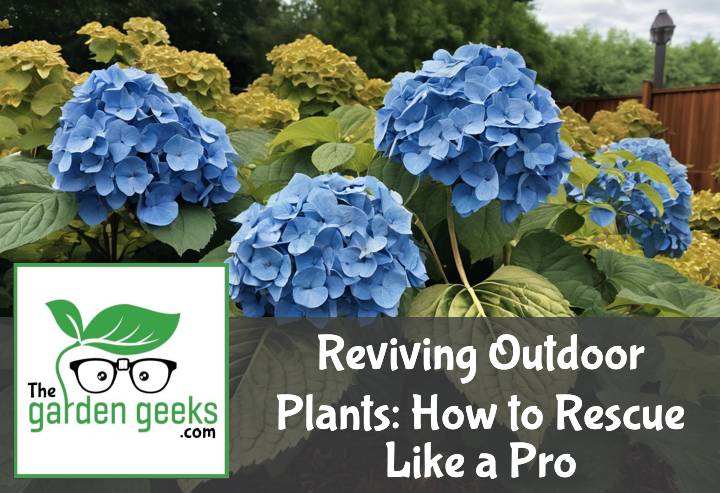
So put on those gardening gloves, grab your watering cans, and let’s dive into the art of reviving outdoor plants. Keep reading about Reviving Outdoor Plants!
Quick Answer
- Identify signs of distress in your outdoor plants, such as visual symptoms and environmental stressors.
- Follow a step-by-step revival technique for wilted plants, which will be detailed in the blog post.
- Optimize watering practices by understanding your plant’s specific needs and applying proper techniques.
- Adjust soil and nutrition by evaluating soil quality and using essential nutrients or fertilizers for revival.
- Implement effective pruning and maintenance strategies to keep your plants healthy.
- Learn to recognize signs of bug infestations and apply appropriate solutions for bug-infected plants.

Identifying the Signs of Distress in Outdoor Plants
Recognizing when your outdoor plants are yelling “Help!” is key to saving them. Let’s dive into the clues they give us.
Visual Symptoms of Unhealthy Plants
Spotting an unhealthy plant isn’t as hard as finding a needle in a haystack. First off, yellowing leaves scream, “I’m not okay!” It’s like the plant version of catching a cold. Then there’s wilting. If your plant looks like it’s too tired to stand up straight, it’s definitely stressed out.
Another red flag? Leaf spots. These are like blemishes on your plant’s face, showing something’s wrong inside. And if the leaves look more skeleton than leaf, that’s bad news bears. Bugs might be having a feast.
Each of these signs tells us our green buddies need some TLC, stat.
Environmental Factors Contributing to Plant Stress
Plants can be drama queens when their environment goes haywire. Too little water? They droop in despair, showing drought stress. But drown them in H2O and you’ll see overwatering damage, like root rot or leaves turning yellow and falling off prematurely.
Temperature swings make them moody too. A sudden chill or heatwave can throw them for a loop faster than you can say “climate change.” And let’s talk dirt – poor soil quality makes for sad plants because they can’t get the nutrients they need.
Lastly, sunlight is like their favorite food but too much or too little leaves them hangry (hungry + angry). Finding that Goldilocks zone of just-right sunlight is crucial.
Understanding these environmental no-nos helps us keep our leafy friends happy and healthy.
Step by Step Revival Techniques for Wilted Plants
When your plants look more like they’re ready for a plant funeral rather than flourishing in your garden, don’t throw in the trowel just yet! Wilted plants can often be brought back from the brink with a little TLC and some strategic care. Here’s how to nurse those droopy greens back to health, step by easy step.
-
Check the soil moisture first. Stick your finger about an inch into the soil near your plant. If it’s dry, your plant is thirsty! If it’s soggy, you might have overwatered it. Getting this right is crucial because too much or too little water can both lead to wilting.
-
Water deeply but gently if the soil is dry. Give your wilted friend a good drink, allowing water to penetrate deeply into the soil rather than just wetting the surface. This encourages roots to grow deeper, making them stronger and more able to support a healthy plant.
-
Provide shade for heat-stressed plants. If your plant is wilting due to too much sun, create some temporary shade using an umbrella or a cloth screen. This can help protect it from the harsh rays while it recovers.
-
Trim any damaged leaves or stems with clean scissors or pruning shears. Removing these parts helps prevent disease and pests from attacking the weakened plant and allows it to focus its energy on recovery.
-
Add mulch around the base of the plant after watering. A 2-3 inch layer of organic mulch like straw or wood chips can help retain soil moisture and regulate temperature, giving your plant a more stable environment to recover in.
-
Use a diluted liquid fertilizer if your plant shows signs of nutrient deficiency (like yellowing leaves). Sometimes, plants wilt because they’re hungry! A gentle feed with a balanced liquid fertilizer can give them the boost they need without overwhelming them.
-
Monitor and adjust as necessary over the next few days and weeks. Keep an eye on soil moisture, sun exposure, and overall plant health, tweaking your care routine as needed until your plant starts showing signs of revival.
By following these steps carefully, you’ll give your wilted plants a fighting chance at making a full comeback – turning that garden gloom into bloom once again!
Optimizing Watering Practices for Recovery

Getting your outdoor plants back to their glory days starts with mastering the art of watering. It’s all about giving them just the right amount of plant hydration.
Assessing Your Plant’s Water Needs
First off, not all plants gulp water the same way. Some are like camels, storing water for the dry days, while others need a sip more often. To figure out what camp your plant falls into, start by checking its label or doing a quick online search. This will tell you if you’re dealing with a drought-tolerant plant or one that can’t handle going thirsty.
If your plant’s leaves are drooping or turning yellow, it might be screaming for water. On the flip side, if the leaves look soggy or there’s mold growing, you’ve probably been overdoing it. The key is finding that sweet spot where your plant is getting just enough water without drowning or drying out.
Different plants have different moisture requirements. For example, succulents love dry soil between drinks, while ferns prefer to stay moist. Stick your finger in the soil; if it feels dry a couple of inches down, it’s time to water.
Techniques for Proper Watering
Now that you know how thirsty your plant is, let’s talk about how to quench that thirst properly. The best way to water most plants is by using a method called deep watering. This means slowly watering the soil until it’s wet deep down where the roots are. This encourages roots to grow deeper, making your plant stronger and happier.
Avoid watering just a little bit every day because this can lead to shallow root growth and weaker plants. Also, timing matters! Watering in the early morning or late afternoon helps reduce evaporation so more water goes where it’s needed.
For those who can’t always be there to water at the perfect time, consider setting up a drip irrigation system. It drips water slowly directly to each plant’s base, which is super efficient and takes care of the watering for you.
Remember not to go overboard with watering after your plant has had a tough time. Too much love can be just as bad as not enough!
Adjusting Soil and Nutrition for Plant Health
Getting your outdoor plants back to their glory days starts with the dirt. Yes, soil quality and plant nutrition are big deals here. Let’s dive into how tweaking these can turn things around.
Evaluating Soil Quality and Composition
First off, checking your soil is like being a plant doctor. You gotta know what’s up beneath those roots. Soil quality assessment isn’t rocket science but think of it as a puzzle. The pieces? pH level, soil texture, and nutrient content.
A simple pH test can tell you if your soil is more like a lemon or baking soda. Plants are picky eaters; they thrive in just the right pH. If it’s off, your plants might be missing out on key nutrients.
Next up, let’s talk about feeling the soil—literally. Soil texture matters because it affects water drainage and root growth. Too sandy or too clayey? Your plants could be thirsty or drowning.
Lastly, knowing what nutrients are already in your garden bed helps you figure out what’s missing. Low on nitrogen? Your plant might look a bit yellow. A comprehensive soil test covers this, revealing exactly what your green buddies need.
Essential Nutrients and Fertilizers for Revival
Plants need snacks to bounce back, specifically essential plant nutrients like nitrogen for green leaves, phosphorus for strong roots, and potassium for overall health. But there’s more to the menu—calcium, magnesium, and sulfur play supporting roles too.
Choosing the right fertilizer types is like picking the best medicine. Got nutrient deficiencies? There’s a fertilizer for that. Organic options feed slowly but surely, while synthetic ones give a quick fix.
Remember though, more isn’t always better with fertilizers. It’s all about balance—giving your plants just enough to revive without going overboard.
In short, reviving outdoor plants is part art, part science. Assessing soil composition, adding the right nutrients, and choosing suitable fertilizers kickstarts the journey from wilted to wow.
Pruning and Maintenance Strategies
When your outdoor plants look like they’ve seen better days, don’t fret! A little TLC can go a long way. Pruning and maintenance are like giving your plants a spa day; they’ll come out looking refreshed and ready to thrive. Let’s get into the nitty-gritty of how to do this right.
-
Identify dead or diseased branches: These are the plant’s cry for help. Look for branches that are brown, have no leaves, or show signs of disease like spots or fungus. Snipping these off not only makes your plant look better but also prevents disease from spreading.
-
Use the right tools: Imagine cutting a tomato with a blunt knife. Not pretty, right? The same goes for pruning. Use sharp, clean shears or scissors to make clean cuts that heal quickly.
-
Understand the best time to prune: Timing is everything! Generally, late winter or early spring is ideal because plants are still dormant. However, some plants prefer being pruned right after they bloom. A quick Google search about your specific plant type will save you from a pruning faux pas.
-
Don’t overdo it: Think of pruning like trimming hair; you can always cut more but can’t stick it back on once it’s gone. Remove only what’s necessary—dead or diseased branches and any that are crossing over others causing crowding.
-
Water wisely post-pruning: After giving your plants a trim, they’ll need some hydration to recover. But too much water can be as bad as too little. Check the soil before watering; it should be moist but not soggy.
-
Feed them well: Post-pruning is an excellent time to give your plants some extra nutrition with fertilizer or compost. This helps them bounce back stronger and healthier.
-
Monitor and adjust support structures: If your plant relies on stakes or trellises for support, check these structures during pruning. Adjustments may be needed as the plant changes shape and size.
Pruning and maintenance don’t have to be daunting tasks. With these strategies in hand, you’re well on your way to reviving your outdoor plants and making your garden the envy of the neighborhood!
Signs and Solutions for Bug Infected Plants
| Signs of Infection | Type of Bug | Solution |
|---|---|---|
| Yellowing leaves, sticky residue on plant or nearby surfaces | Aphids | Use insecticidal soap or neem oil, introduce beneficial insects like ladybugs |
| Holes in leaves, eaten edges, visible caterpillars | Caterpillars | Handpick caterpillars off plants, use Bacillus thuringiensis (Bt) as a biological control |
| White spots on leaves and stems, powdery substance on plant | Mealybugs | Use alcohol-soaked cotton swabs to remove bugs, apply insecticidal soap |
| Tiny webs on plants, yellow or dry spots on leaves | Spider Mites | Increase humidity around the plant, use miticides if infestation is severe |
| Chewed leaves and flowers, visible beetles | Japanese Beetles | Handpick beetles off plants early in the morning, use traps or natural predators |
| Distorted or curled leaves, stunted growth | Thrips | Prune and discard infested leaves, use blue sticky traps to catch adults |
| Silvery trails on leaves or soil surface | Slugs/Snails | Use beer traps or copper tape around pots/planters to deter them |
| Wilted plants despite sufficient watering | Root Aphids | Drench soil with neem oil or insecticidal soap solution |

To Wrap Up
So, you’ve made it through the jungle of Reviving Outdoor Plants. Remember, the key is to notice signs of stress early and act fast.
Don’t be afraid to prune, re-pot, or change your watering habits. And remember, patience is a virtue when dealing with plants.
Finally, if you’re still feeling lost in the weeds, don’t hesitate to seek out more resources or ask for help. You’ve got this!
Question
What are some common mistakes people make when trying to revive outdoor plants?
Answer
Overwatering and over-fertilizing are two common mistakes. People often think more is better, but this can actually harm the plant. It’s also important not to prune too aggressively during recovery.
Question
How long does it typically take for a plant to recover?
Answer
The recovery time for a plant can vary widely depending on the species and severity of its condition. However, you should start seeing signs of improvement within a few weeks with proper care.
Question
Can all types of outdoor plants be revived?
Answer
While many plants can bounce back from a state of distress, some may be too far gone to save. Early detection and intervention are key to successful plant revival.
Question
Is it possible to over-prune a distressed plant?
Answer
Yes, over-pruning can further stress an already weakened plant. It’s important to only remove dead or diseased parts of the plant during its recovery period.
Question
What if my plants keep getting infested with bugs even after treatment?
Answer
Persistent bug problems might indicate an underlying issue with your plant’s health or the surrounding environment. Consider consulting with a local horticulturist or extension service for targeted advice.