
Ever looked at your once lush, green lawn only to find patches of dying grass? It’s a heartbreaking sight for any homeowner. But don’t lose hope! Learning How to Revive Dying Grass isn’t as complicated as you might think.
Understanding the causes and signs of dying grass is the first step towards reclaiming your lawn’s health. From lack of water to pest infestation, numerous factors can make your grass lose its vigor.
But fear not! With proper care, treatment, and preventive measures, you can breathe new life into your lawn. So let’s dive in and turn that brown patch into a lush green carpet again! Keep reading about How to Revive Dying Grass.
Key Takeaways
- Identify the problem: Is your grass thirsty, sunburnt, or sick?
- Watering: Grass needs a good drink, but not too much. Overwatering can drown it.
- Sunlight: Too much sun can fry your lawn. Consider shade solutions if necessary.
- Disease control: If your grass is sick, it might need some medicine (fungicides).
- Nutrition: Feed your lawn with fertilizers to give it the nutrients it needs to thrive.
- Reseeding: Sometimes, you just gotta start over and plant new seeds.

Understanding the Causes of Dying Grass
Getting to the root of how to revive dying grass isn’t just about throwing water and fertilizer at it and hoping for the best. It’s a detective game where you need to understand the culprits behind your lawn’s sad state. From underwatering to mowing it like it owes you money, we’ll dive into what’s turning your green dream into a nightmare.
Lack of Water and Overwatering
First off, let’s talk H2O. Not enough water? Your grass might be throwing a silent tantrum. Signs include blades that are more brittle than your last diet resolution and a color palette ranging from “sickly yellow” to “desert chic.” Proper lawn hydration methods are key, aiming for that sweet spot where your soil feels like a wrung-out sponge – moist but not soggy.
Flip the script, and there’s overwatering – basically drowning your grass in love. Overwatering symptoms include a squishy feel underfoot as if you’re walking on wet sponges, and you might even kickstart a pool party for fungi. Finding balance is crucial; think of watering your lawn like cooking pasta – too little or too much, and it’s just not right.
Nutrient Deficiency
Imagine trying to run a marathon on a diet of soda and candy bars. That’s your grass without the right nutrients. Soil nutrient testing can reveal this dietary faux pas, showing deficiencies that make your lawn look less “lush green” and more “ghostly pale.” Common signs include yellowing leaves and stunted growth – basically, your grass on a bad day.
Now, correcting these with fertilizing lawns properly is like switching from fast food to whole foods for your lawn. Essential lawn nutrients act as the perfect multivitamin, giving your grass the boost it needs to go from languishing to flourishing.
Disease and Pest Infestation
Next up are those uninvited guests: diseases and pests. Lawn disease identification starts with spotting irregular patches or mysterious patterns that weren’t part of your original garden design. And pests? They’re sneakier than midnight snackers, leaving behind chewed-up blades or creating cozy homes in soil tunnels.
But don’t panic! Preventing turf diseases often involves cultural practices like proper watering and mowing, while pest control for lawns might mean introducing beneficial insects or consulting with pros when things get too wild.
Improper Mowing Practices
Last but not least: mowing mishaps. Cutting your grass too short is akin to scalping, exposing tender roots to the harsh sun – talk about adding insult to injury! The correct mowing height for lawns keeps things tidy without putting stress on the grass.
Switch gears by adopting healthy mowing frequency tips – think of it as regular trims rather than full-on haircuts. This encourages stronger roots and denser growth because let’s face it, no one enjoys a bad haircut, including your lawn.
Signs Your Grass is Dying
Spotting the early dying grass signs can be the difference between a quick recovery and a total lawn do-over. Let’s dive into what those SOS signals from your lawn might look like, so you’re ready to spring into action.
Discoloration and Brown Patches
Ever looked out your window and thought, “Why does my lawn look like it’s throwing a brown patch party?” Well, you’re not alone. Grass discoloration and brown patches are more than just eyesores; they’re your lawn crying out for help. These symptoms often point to deeper issues like fungal diseases in lawns or drought stress symptoms.
First off, let’s talk about why your grass might be changing colors faster than a chameleon on a disco floor. It could be due to fungal diseases that love to feast on your lawn or perhaps because the soil is as dry as grandma’s Thanksgiving turkey (we all know it’s true). Identifying the cause is crucial because treating brown patches without knowing their origin is like trying to bake a cake without knowing the flavor – you might end up with something nobody wants.
Now, onto those pesky brown patches. They’re not just there to ruin your weekend BBQ plans; they indicate areas where your grass has given up the ghost or is on its last legs. But fear not! With some detective work and lawn recovery tips, you can bring these spots back from the dead. It might involve adjusting your watering habits, fighting off fungal invaders with fungicides, or simply giving your lawn some TLC with proper fertilization.
Remember, reviving your lawn from discoloration and brown patches isn’t an overnight success story. It takes patience, persistence, and a bit of elbow grease. But with the right approach, you’ll be well on your way to hosting that BBQ on a lush, green carpet in no time.
Thinning Grass or Bare Spots
Thinning grass or spotting bare patches in your once-thick carpet of green can feel like watching a horror movie unfold in slow motion—terrifying yet hard to look away from. The causes behind this hair-raising scenario range from soil compaction effects to overwatering damage, each requiring its unique fix.
Let’s start with soil compaction—a real party pooper for roots trying to breathe and grow. When soil becomes as packed as sardines in a can, water and nutrients can’t flow freely, leaving roots gasping for air (and life). The solution? Aeration! Punching holes in your soil might seem counterintuitive but think of it as giving your lawn room to stretch its legs after being cramped up in economy class.
Next up: overwatering—the classic case of too much love killing slowly. While water is life, too much of it turns lawns into swampy messes where only mosquitoes find happiness. If puddles are more common than blades of grass in your backyard oasis, it’s time to dial back on the H2O and let things dry out a tad.
Repairing bare spots isn’t rocket science but requires playing matchmaker between soil and seed—ensuring they’re compatible for growth success. Sometimes adding topsoil or compost can boost this relationship by providing nutrients needed for sprouting seeds.
In essence, thinning grass or bare spots don’t mean game over; they signal it’s time for some lawn-loving intervention—be it aerating compacted soil or adjusting watering schedules—to get back that thick green blanket worthy of barefoot walks at sunset.
Unusual Insect Activity
When creepy crawlies turn your yard into their personal playground, it’s not just an invitation for birds looking for snacks—it’s also one of those glaring red flags signaling potential trouble ahead for your turfgrass kingdom.
Identifying which miniature monsters are wreaking havoc is step one towards reclaiming peace in the valley—or rather peace on the lawn. Not all insects are foes; some are actually undercover allies (beneficial insects for lawns) working tirelessly against real villains like grubs that chew through roots faster than kids through candy stores.
Once you’ve pinpointed whether you’re dealing with friend or foe (identifying lawn pests), choosing how to deal with them becomes crucial—and nope, reaching immediately for chemical warfare isn’t always the answer (insecticide use in gardens). Mother Nature has equipped us with plenty of natural pest control methods that won’t leave our little slice of earth resembling a toxic wasteland.
For instance, introducing nematodes (the good guys) into the mix can help take down grub populations without harming beneficial insects or pets frolicking around. Also considering practices such as maintaining healthy soil balance and encouraging predator insects can create an environment less appealing to pests looking for their next home invasion venue.
In conclusion: unusual insect activity doesn’t have to spell disaster for how to revive dying grass efforts if tackled thoughtfully—with respect both for our tiny adversaries (and allies) as well as Mother Earth herself.
Step-by-Step: Reviving Your Dying Grass
Now that we’ve identified the signs of dying grass and understood the common culprits behind this garden tragedy, it’s time to roll up our sleeves and breathe life back into your lawn. Fear not, for reviving your grass isn’t as daunting as it seems. With a bit of care, attention, and the right steps, you’ll be on your way to a lush, green paradise in no time. Let’s dive into the nitty-gritty of how to turn things around.
-
Water Wisely: Believe it or not, there’s an art to watering your lawn correctly. Early morning is the best time to water because it allows moisture to reach deep into the soil without too much excess water lost to evaporation. Aim for about 1 inch of water per week, either from rainfall or manual watering. This encourages deep root growth which is essential for a healthy lawn.
-
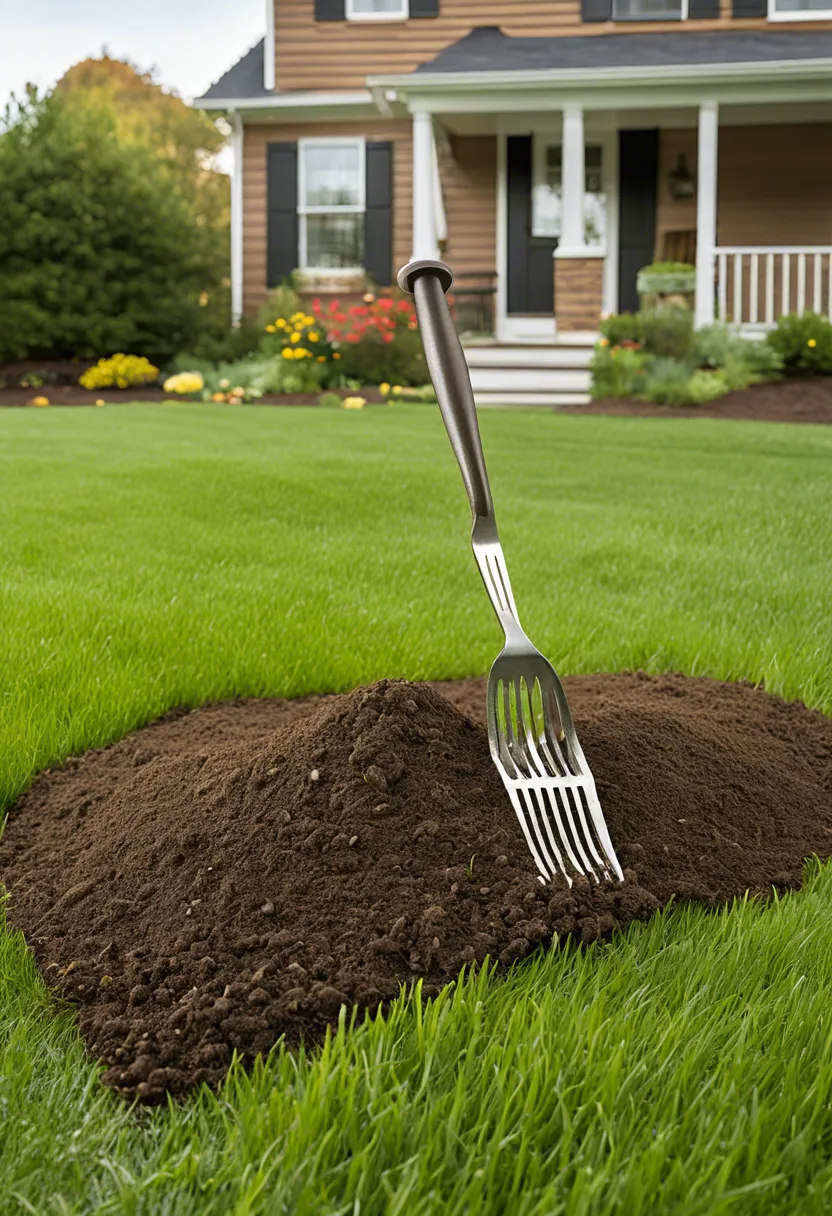
Soil Aeration: If your lawn feels hard underfoot or if water puddles on the surface after rain, it’s screaming for some air! Aerating involves making small holes in the soil to allow air, water, and nutrients to penetrate the grass roots. You can rent an aerator machine or use a simple garden fork to do this job.
-
Overseed: Spots looking thin? Overseeding can help thicken up your lawn by introducing new grass seeds into existing turf areas. Choose a seed mix that matches your current lawn type for best results. The key here is ensuring good seed-to-soil contact by lightly raking over the seeded areas.
-
Fertilize with Care: Grass needs food too! Applying a slow-release nitrogen fertilizer can give your lawn the boost it needs without burning it out with too much chemical love at once. Be sure to follow package directions closely – more isn’t always better when it comes to fertilizers.
-
Weed Control: Weeds are not just unsightly; they’re also thieves stealing precious resources from your grass. Tackle weeds by hand-pulling or using herbicides specifically designed for lawn care – but only as needed. Remember, a healthy lawn is your best defense against weeds taking over.
-
Mow Properly: Mowing might seem straightforward, but cutting your grass too short can stress it out and invite pests and diseases. Keep blades sharp and never cut more than one-third of the grass blade length at a time. Also, leave those clippings on the lawn as they decompose; they’ll provide valuable nutrients back into the soil.
-
Monitor & Adjust: Finally, keep an eye on your lawn’s progress and be ready to adjust your care routine as needed based on weather conditions and how quickly (or slowly) your grass responds to treatment.
By following these steps diligently, you’re setting up your yard for success and recovery from whatever has been causing its decline. Remember, patience is key—reviving dying grass doesn’t happen overnight but with consistent care and attention, you’ll see improvements before long.
Choosing the Right Treatment for Your Lawn
Finding the perfect fix to revive dying grass can feel like detective work. But don’t worry, we’re here to guide you through adjusting watering practices, fertilizing properly, and fighting off pesky pests.
Adjusting Watering Practices
Water is life, especially for your parched lawn. But there’s a fine line between quenching its thirst and drowning it. The key? Efficient watering methods that promote deep root growth without inviting diseases. First off, timing is everything. Water your grass early in the morning when less water evaporates and plants can drink up all day long.
Now, how often should you water? It’s not about sticking to a strict schedule but observing your lawn. If it looks thirsty—go ahead and water it. However, aim for longer, less frequent watering sessions to encourage roots to reach deeper into the soil for moisture.
And let’s talk technique—sprinklers are great but make sure they’re hitting your grass, not the sidewalk. Consider investing in a drip irrigation system for a more targeted approach that saves water and gets right to the roots.
Lastly, preventing overwatering is crucial. Too much love in the form of H2O can lead to shallow roots and fungal diseases. So keep an eye on rainfall and adjust accordingly because sometimes Mother Nature does half the job for you.
Applying Fertilizers and Soil Amendments
Not all heroes wear capes; some come in bags labeled “fertilizer.” But before you start sprinkling magic dust everywhere, let’s talk soil health. Grab a soil test kit from your local garden center to figure out what your lawn is craving—be it nitrogen, phosphorus, or potassium.
Choosing lawn fertilizers isn’t rocket science once you know what nutrients are missing. And remember, timing is as important as selection—early spring or fall are prime times for feeding your lawn so it can grow strong roots.
For those leaning green, organic soil amendments like compost or bone meal can do wonders in improving lawn soil health without harsh chemicals. These natural boosters not only feed your grass but also improve soil structure so roots have an easier time spreading out.
Applying these goodies correctly ensures they do their job without waste or environmental harm. Follow package instructions closely or consult with a local gardening expert to get it right.
Using Pest Control Measures
Your lawn might be under attack by tiny invaders munching away at its glory—yes, we’re talking pests here! Identifying these critters is step one; look out for brown patches or thinning areas which could signal an infestation of grubs or other insects.
Once you’ve played detective and pinpointed the problem, it’s decision time: chemical warfare or going au naturel? Natural pest control for lawns includes introducing beneficial nematodes that prey on pests without harming your grass.
But if things have gone too far south for natural remedies alone, chemical options might be necessary—but use them wisely! Opt for products specifically designed for safe pest eradication methods that target pests while sparing your precious greens.
Remember though; prevention beats cure any day! Regularly inspecting your lawn and maintaining healthy growth practices goes a long way in keeping those pesky pests at bay.
Preventive Measures for Healthy Grass Growth
Alright, now that we’ve tackled the SOS signals your lawn has been sending, let’s gear up with some armor to protect it from hitting rock bottom again. Think of this as your grass’s personal training routine to bulk up and fend off any future threats. Here’s how you can be the ultimate lawn guardian:
-
Water wisely: Just like you wouldn’t chug a gallon of water in one go, don’t drown your grass with love. Aim for deep, infrequent watering sessions rather than daily sprinkles to encourage strong root growth.
-
Mow with care: Treat your mower like a barber giving a precision haircut. Keep those blades sharp and set them high. Scalping your lawn is a big no-no if you want it lush and healthy.
-
Feed it right: Grass is not much different from us; it needs a balanced diet too. Use fertilizers that match your soil’s pH and nutrient needs. Think of it as picking the right protein shake for your workout regime.
-
Aerate the soil: Let your lawn breathe by aerating it at least once a year. This process allows air, water, and nutrients to penetrate deeper into the soil, promoting robust root systems.
-
Overseed patchy areas: Don’t let bald spots ruin the party. Overseeding helps thicken up those sparse areas, creating a dense, vibrant turf that’s less inviting to weeds and pests.
-
Control weeds early: Be vigilant and tackle weeds before they take over by using pre-emergent herbicides or good old-fashioned hand-pulling for those stubborn invaders.
-
Monitor pest activity: Keep an eye out for uninvited guests nibbling on your grass. Early detection and treatment can save you from bigger headaches down the road.
Remember, consistency is key in keeping your lawn in tip-top shape. By following these preventive measures, you’re not just reviving dying grass; you’re setting the stage for years of green bliss under your feet.

To Wrap Up
In a nutshell, reviving dying grass isn’t rocket science. We’ve busted the myth that it’s an uphill task and shown you How to Revive Dying Grass.
Remember, proper watering, fertilization, and aeration are your lawn’s best friends. Don’t forget to keep pests and diseases at bay too!
Now go on, roll up those sleeves and bring your lawn back to life. The green carpet of nature awaits you!